Sponsored Display - Ad Group: export and sync to Google Sheets
Compare ad groups within campaigns to locate differences in delivery and attributed performance.
What this report tells you
A campaign total can hide an ad group that spends heavily or receives little delivery. This report brings ad-group identifiers and names into the same spreadsheet as performance metrics, giving you a more useful starting point for that investigation.
Sponsored Display reports can include click-based and view-related outcome measures. Keep the attribution definition consistent when comparing results. A total sales measure and its click-based counterpart are not independent amounts to add together.
Useful columns to start with
Choose columns for the question you want to answer. These are a starting set from Hopted’s report picker, rather than an exhaustive field list.
- Campaign Id — Use a stable campaign key for grouping and joins.
- Ad Group Id — Distinguish ad groups inside campaigns.
- Ad Group Name — Show the ad-group label in reviews.
- Impressions — Measure reported ad delivery.
- Clicks — Review engagement with the ad.
- Cost — Track advertising cost.
- Sales — Review the report’s attributed sales.
Add Profile ID, Store name, the date field, and Currency where available. They help keep accounts, periods, and monetary amounts distinct.
How to export Sponsored Display - Ad Group to Google Sheets
1. Connect Amazon Ads to Google Sheets
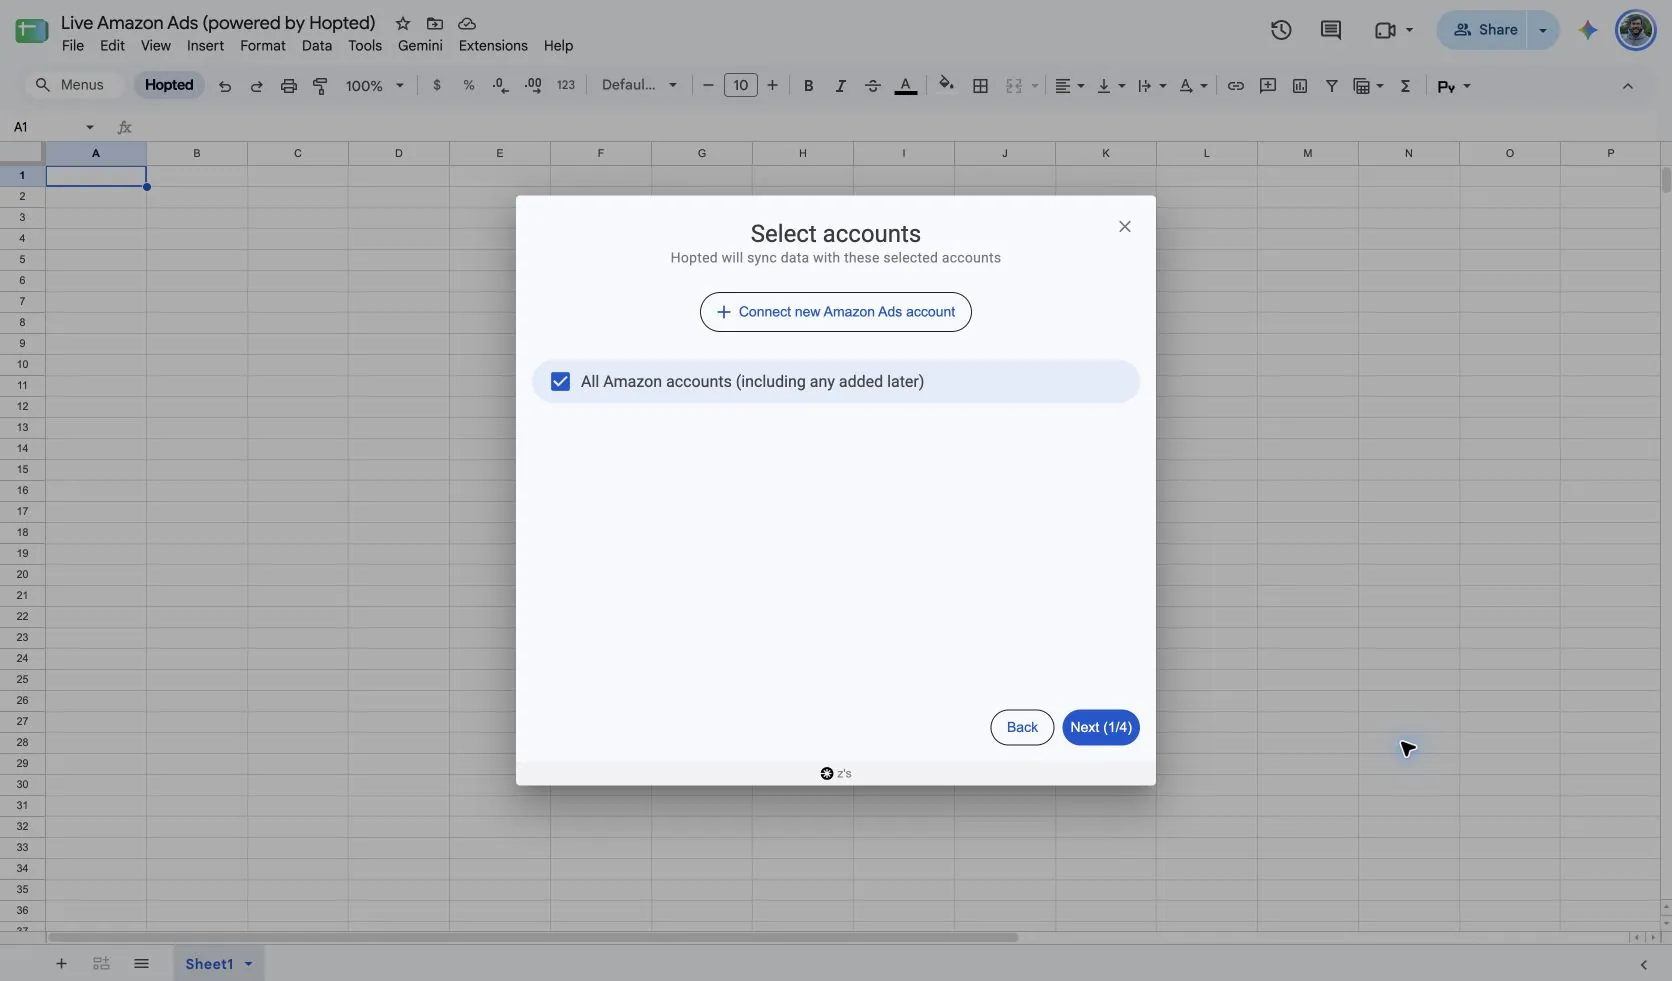
Install Hopted and sign in. To connect Amazon Ads to Google Sheets, open your spreadsheet, click Hopted, then Add new data sync and Amazon Ads. Connect an Ads account if you have not linked one yet, then select the profiles to include. For an account-wide view, choose All Amazon accounts (including any added later).
2. Choose the source, reporting period, and columns
Choose Sponsored Display - Ad Group in the source list. Open its settings to review the reporting period, then use Add beside the columns you want. The screenshot below shows this report in the current Hopted picker.
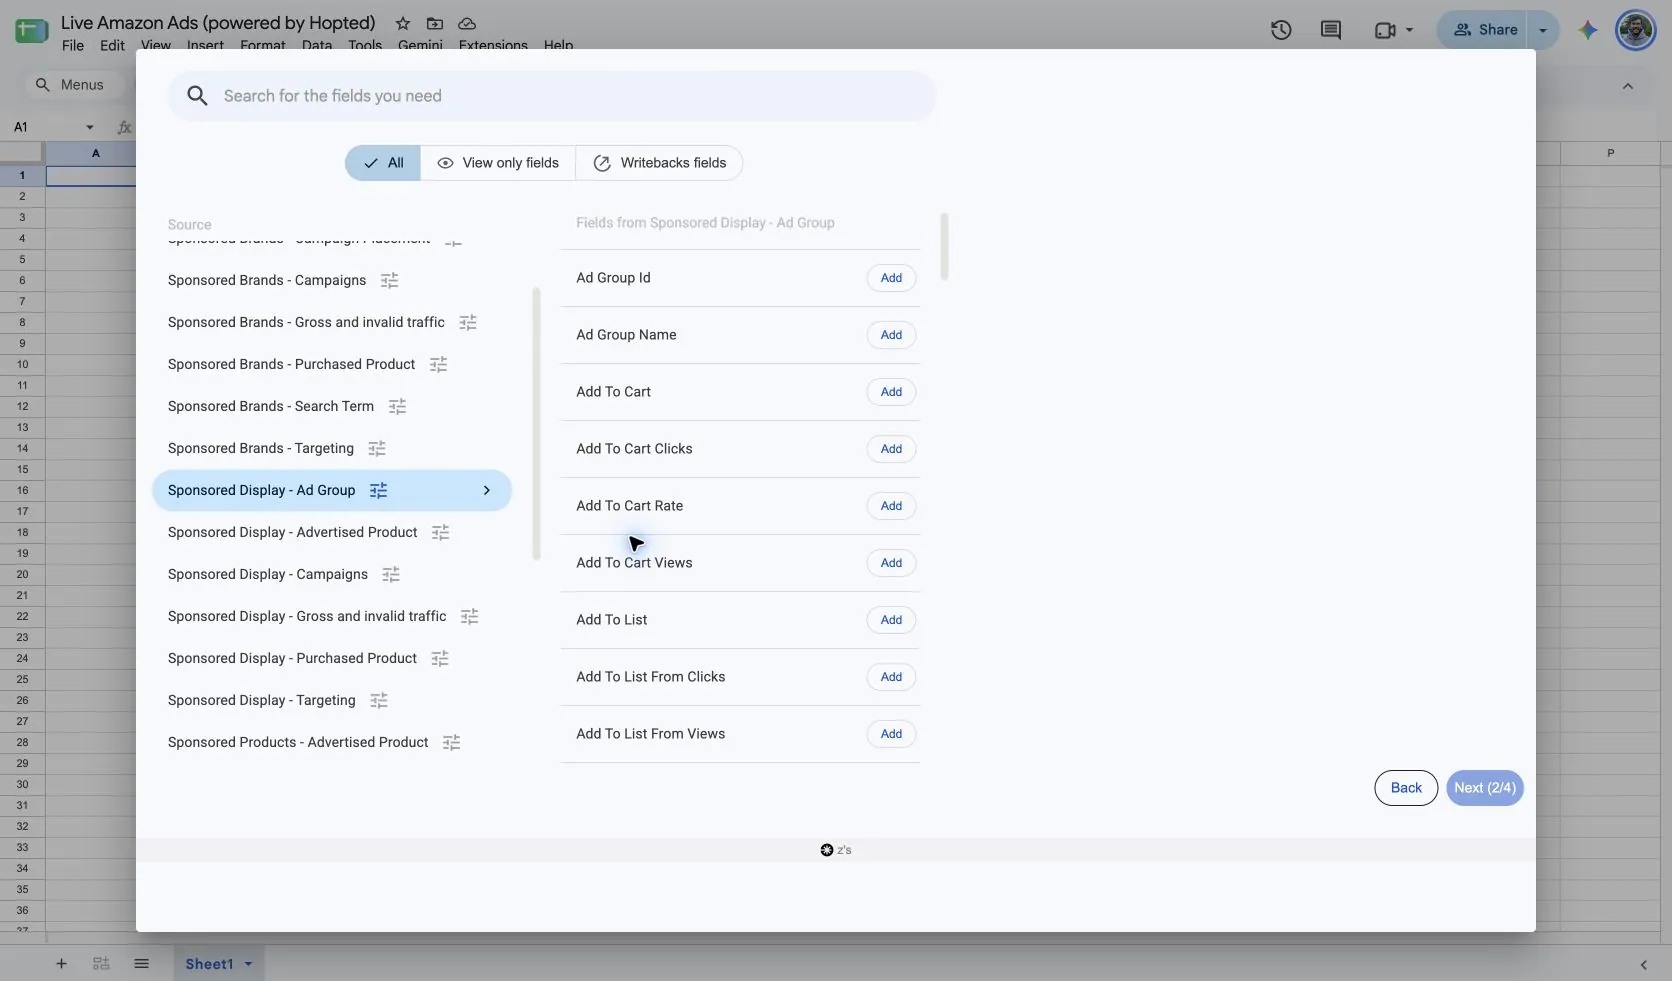
The source settings include a reporting-period choice, such as Previous 30 days. This controls which records are requested; it is separate from the attribution window named in a metric.
3. Review optional filters
Use filters when you want a focused view. Leave them unset for a broader import. Check filters when a result is missing, before assuming the report contains no data.
4. Choose a refresh schedule
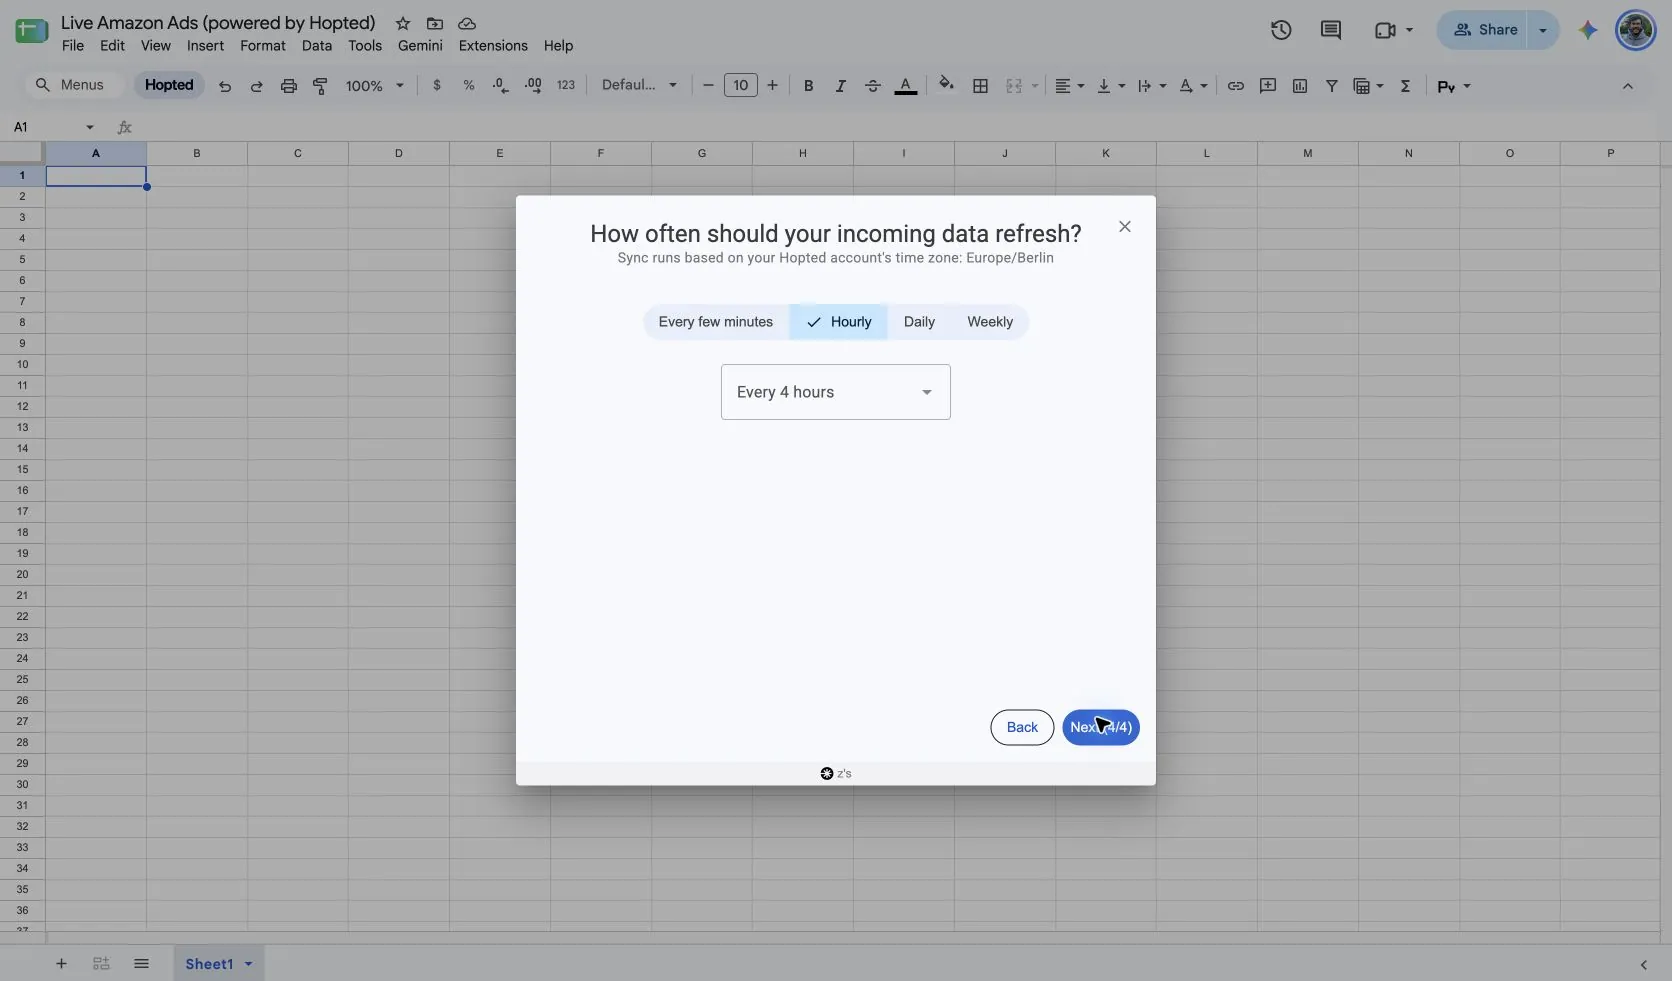
Choose the refresh cadence in Hopted: every few minutes, hourly, daily, or weekly. The schedule screen shows the Hopted account’s time zone. Select a cadence that suits your review and the source’s data availability.
5. Review and create the Sync
Check the accounts, selected fields, filters, and schedule on the review screen. Click Create new Sync when the configuration is ready. Review the imported rows in your Sheet before building formulas or sharing a dashboard.
How to use the report
- Compare ad groups within the same campaign before comparing unrelated campaigns with different objectives.
- Find ad groups with high cost and weak attributed outcomes, then inspect their targeting or advertised products.
- Track an ad group after a change using its identifier. Names can change and are not reliable join keys.
For a sales-efficiency review, calculate ACoS = advertising cost ÷ attributed sales × 100% and ROAS = attributed sales ÷ advertising cost. Use the same currency, reporting period, and attribution basis. Calculate ratios from summed amounts rather than averaging row-level percentages; leave a ratio blank when its denominator is zero.
What to check before comparing results
Ad groups belong to campaigns. Keep both identifiers in the Sheet, and avoid adding campaign-level budget values once for every ad-group row.
Availability depends on the connected profile, marketplace, ad activity, and Amazon’s reporting support. A source appearing in Hopted’s picker does not guarantee rows for every account. Recent results may change as Amazon updates reporting.
Keep each report’s row dimensions intact. Do not add together overlapping breakdowns or combine different currencies without a deliberate conversion. For historical comparisons beyond the source’s available period, review Hopted Data history.
Questions and answers
How do I export Sponsored Display - Ad Group to Google Sheets?
Install Hopted, open a Google Sheet, choose Amazon Ads, select your connected accounts, and choose Sponsored Display - Ad Group as the source. Add columns, review the reporting period and optional filters, then choose a refresh schedule and create the Sync.
Which columns should I start with?
Start with Campaign Id, Ad Group Id, Ad Group Name, Impressions, Clicks. Keep account, date, and currency context where available. You can choose additional fields in Hopted for the review you are building.
Why can the latest results change after a refresh?
Amazon can update recent attributed results as data matures. A Hopted refresh retrieves available data; it cannot make unfinished attribution final. Compare matching reporting periods, currencies, and attribution definitions.
Sources and verification
Report name, setup screens, and example fields checked in Hopted’s Amazon Ads picker on October 13, 2026. Screenshots were captured from the “Live Amazon Ads (powered by Hopted)” Google Sheet.
Amazon Ads campaign reporting provides Amazon’s reporting definitions. See the Amazon Ads connector for the connection overview, or return to the Amazon Ads reports directory.