Amazon Data Connectors For Google Sheets. Full Tutorial 2025

If you're an Amazon seller or an agency managing Amazon accounts, you know the truth: your business runs on spreadsheets [00:08].
Your day is a constant battle of exporting CSVs, copy-pasting data, and wrestling with VLOOKUPs just to answer simple questions. How's your inventory? What's your true profitability? Are your ad campaigns actually working?
You live in Google Sheets, but your data is trapped in the silos of Seller Central, Vendor Central, and the Amazon Ads console.
What if you could bridge that gap? What if you could stop exporting data and start syncing it?
Welcome to Hopted.
Hopted brings supported Amazon data into the Google Sheets you already use. The browser extension helps you build recurring reports without writing code; the available fields depend on the connected account and report.
We're particularly proud of this one. It’s a tool built for the "non-tech" knowledge workers, the operations managers, and the brand owners who just want their data to work.
This walkthrough follows the 2025 video and screenshots. Some buttons may have moved since then, but the sequence is still useful: connect, choose your data, check the result, then schedule it.
You can also watch the film for this tutorial.
Part 1: What is Hopted, and Who is it For?
Before we dive in, let's clarify what Hopted is.
Hopted is a browser extension that integrates directly into your Google Sheets interface [00:38]. When you install it, you get a new Hopted sidebar inside your spreadsheet. This sidebar is your command center for pulling live data from all corners of your Amazon empire, including:
Amazon Vendor Central
This tool is built specifically for Amazon sellers and Amazon agencies [00:08] who are tired of manual data busywork. If you use spreadsheets for any of the following, Hopted is for you:
Order Tracking
Hopted replaces the error-prone, time-consuming process of manual exports with automated, reliable data syncs.
Part 2: Getting Started
Installation can be quick. Your first import may take longer, depending on account authorization and when Amazon makes the requested data available.
Step 1: Install the Hopted Browser Extension
First, you'll need to add Hopted to your browser.
Visit the Chrome Web Store click "Add to Chrome" to install the extension, just like you would for other tools like Jungle Scout or Helium 10 browser extensions.
Step 2: Open Google Sheets & Sign In
Once installed, go to any Google Sheet (or open a new one).
You will now see a "Hopted" button in your Google Sheets menu.
Click it to open the Hopted sidebar.
Click "Sign In" and use your existing Google account [00:58].
Step 3: Grant Secure, Spreadsheet-Level Permission
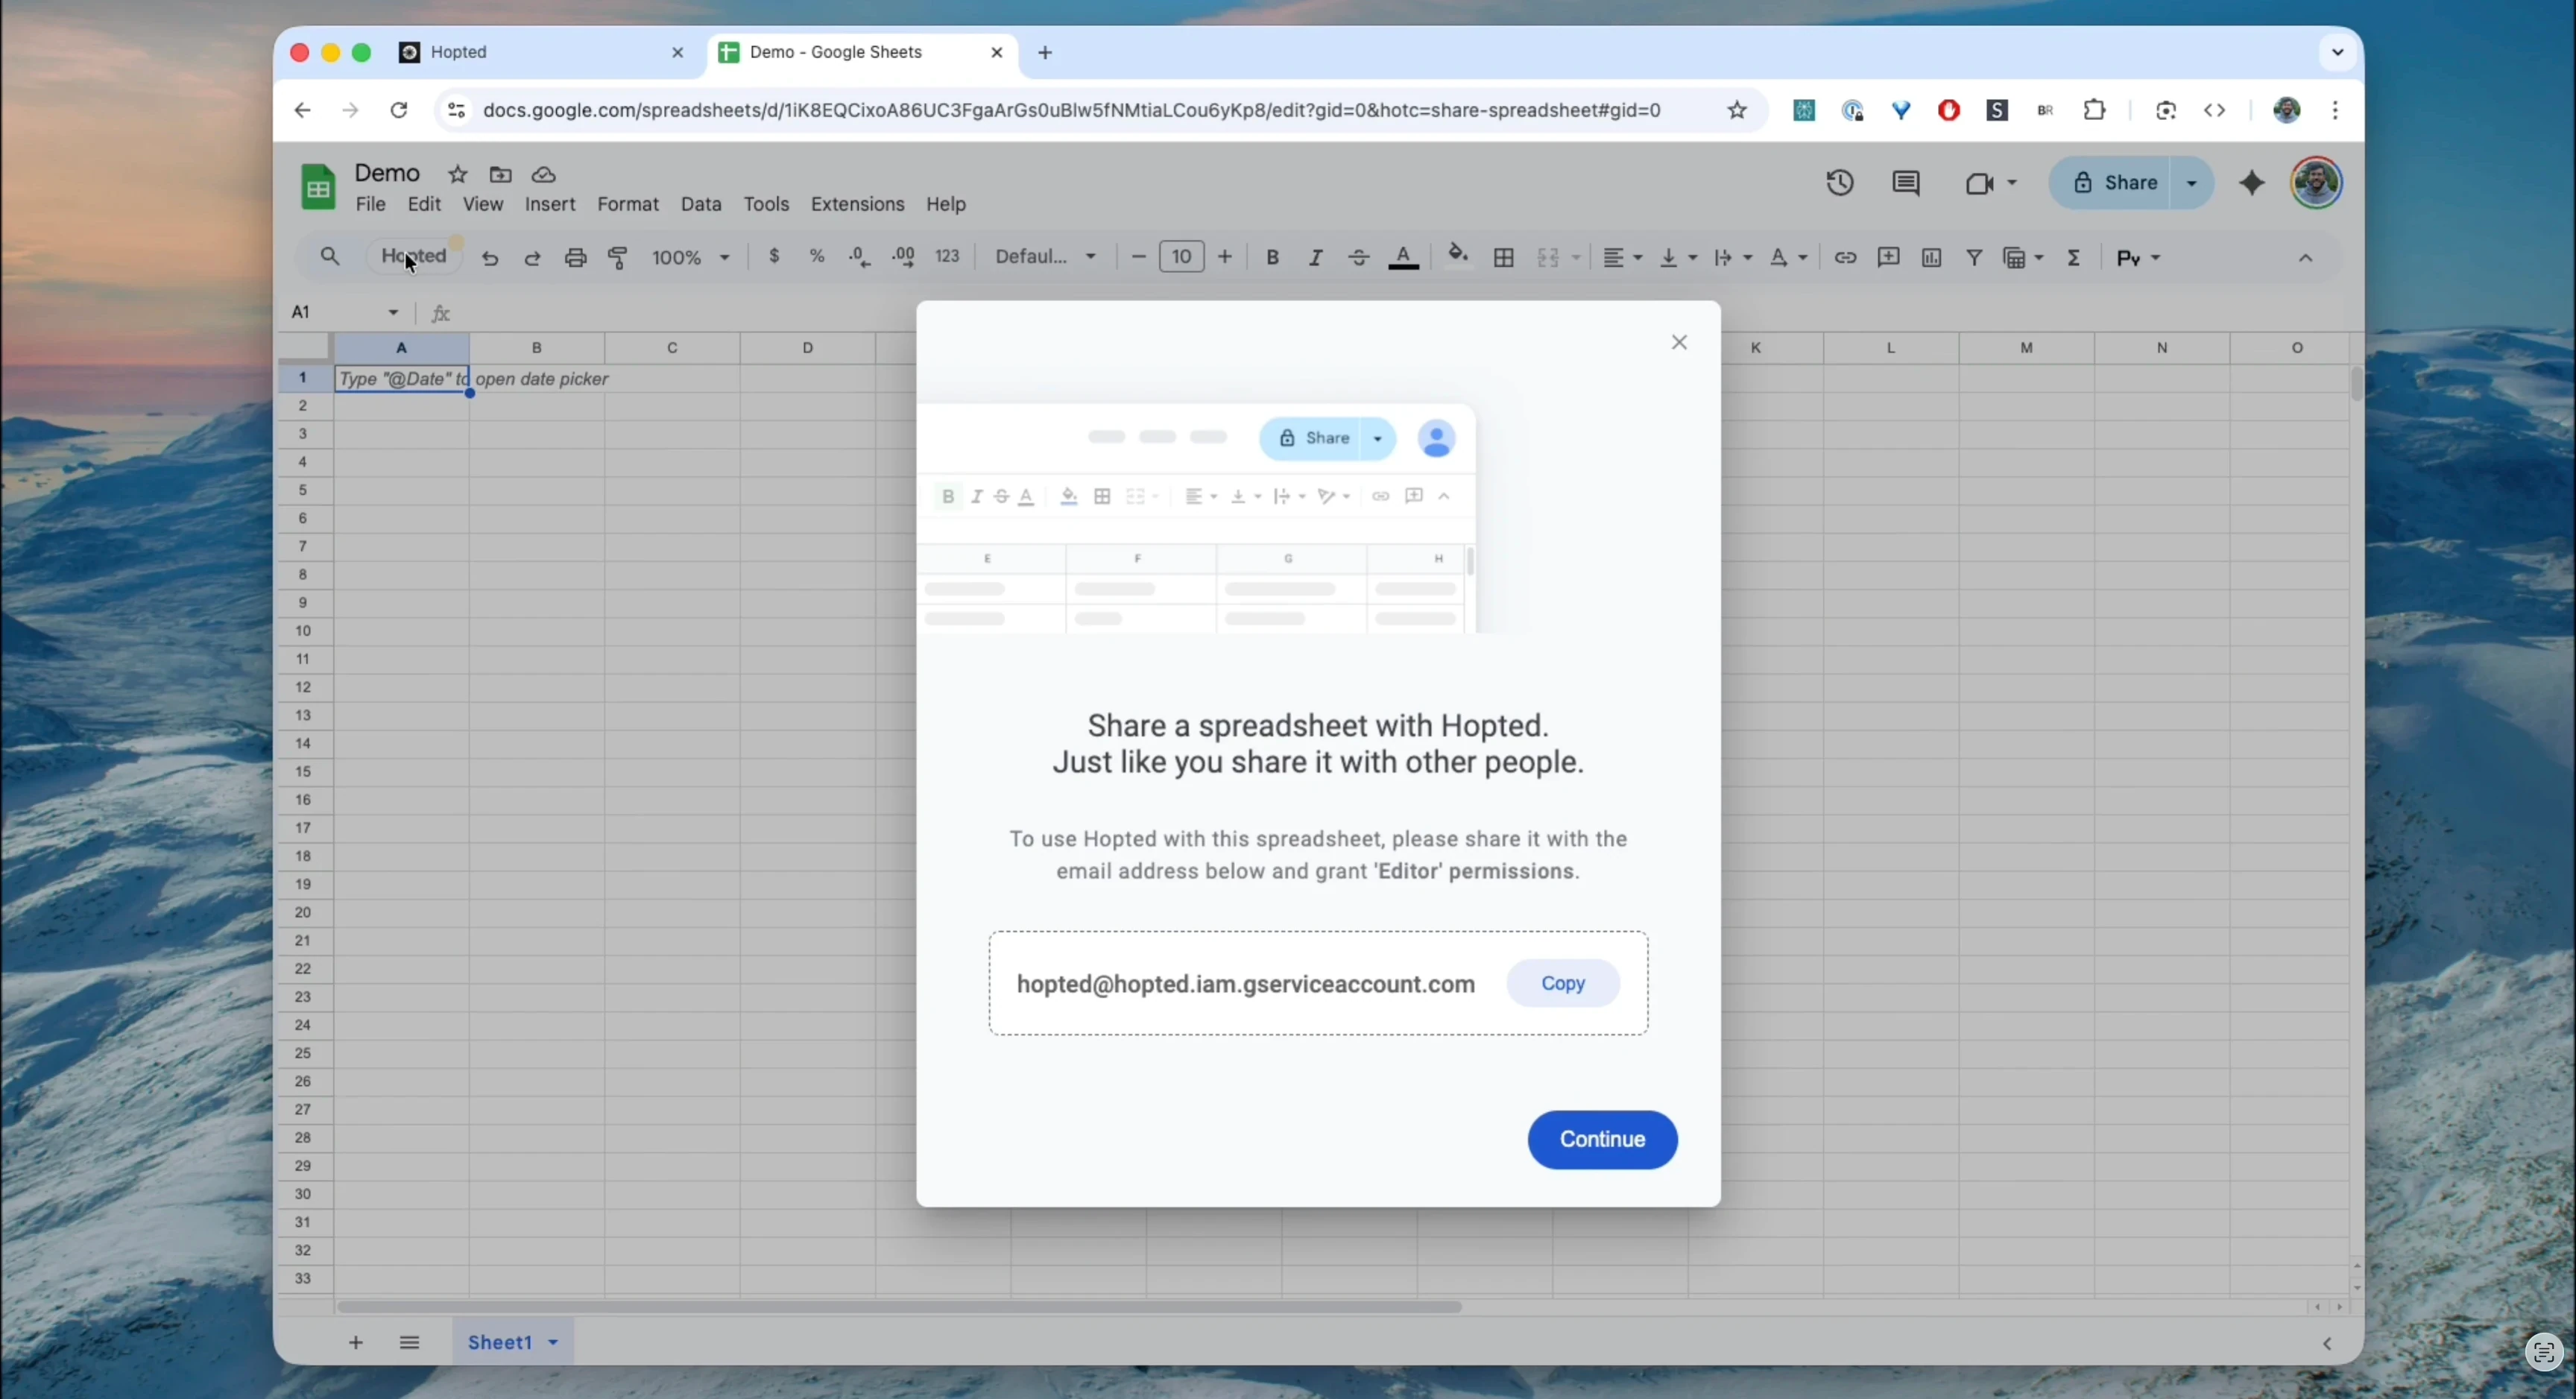
This is a key step and highlights Hopted's commitment to your security.
In the workflow shown here, you share the specific spreadsheet with Hopted’s service account. That grants access to that file; review the actual Google sharing dialog instead of assuming every add-on uses the same permissions.
To grant this, you simply "share" your sheet with Hopted's email address hopted@hopted.iam.gserviceaccount.com, just as you would with a new teammate [01:12].
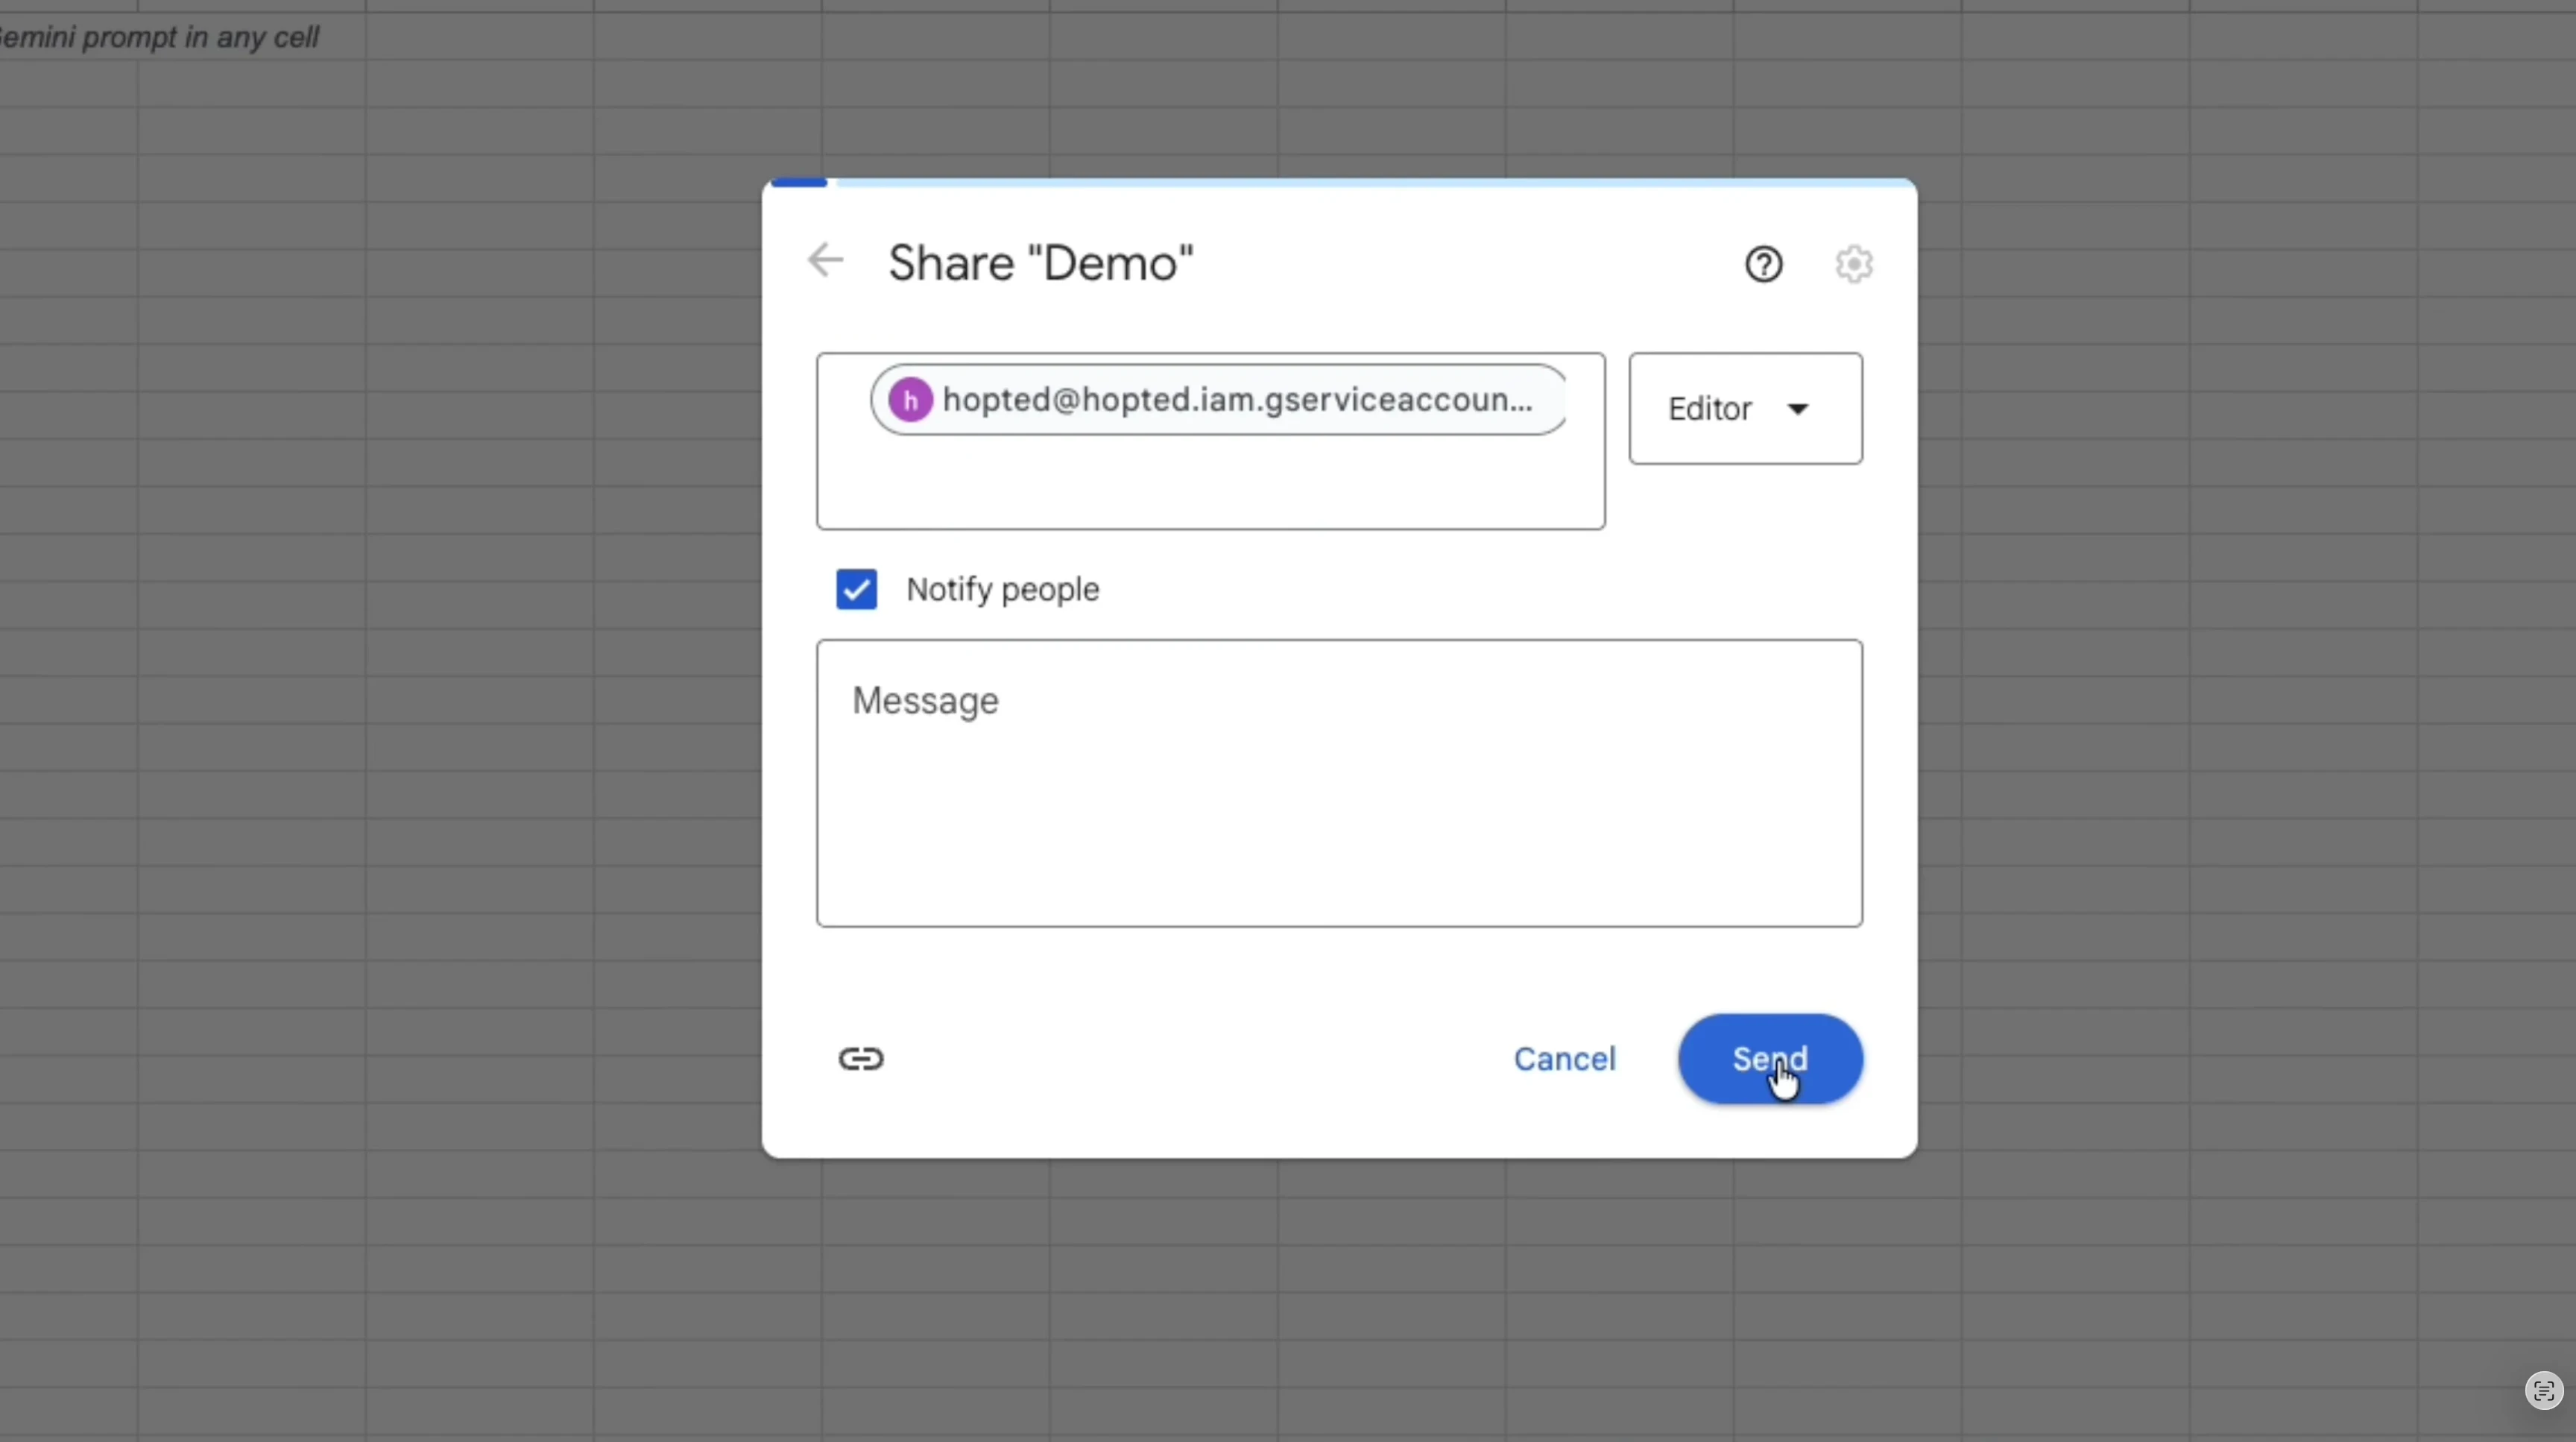
And that's it. You're in.
Part 3: Your Data, Your Way—The 3 Paths to Your First Report
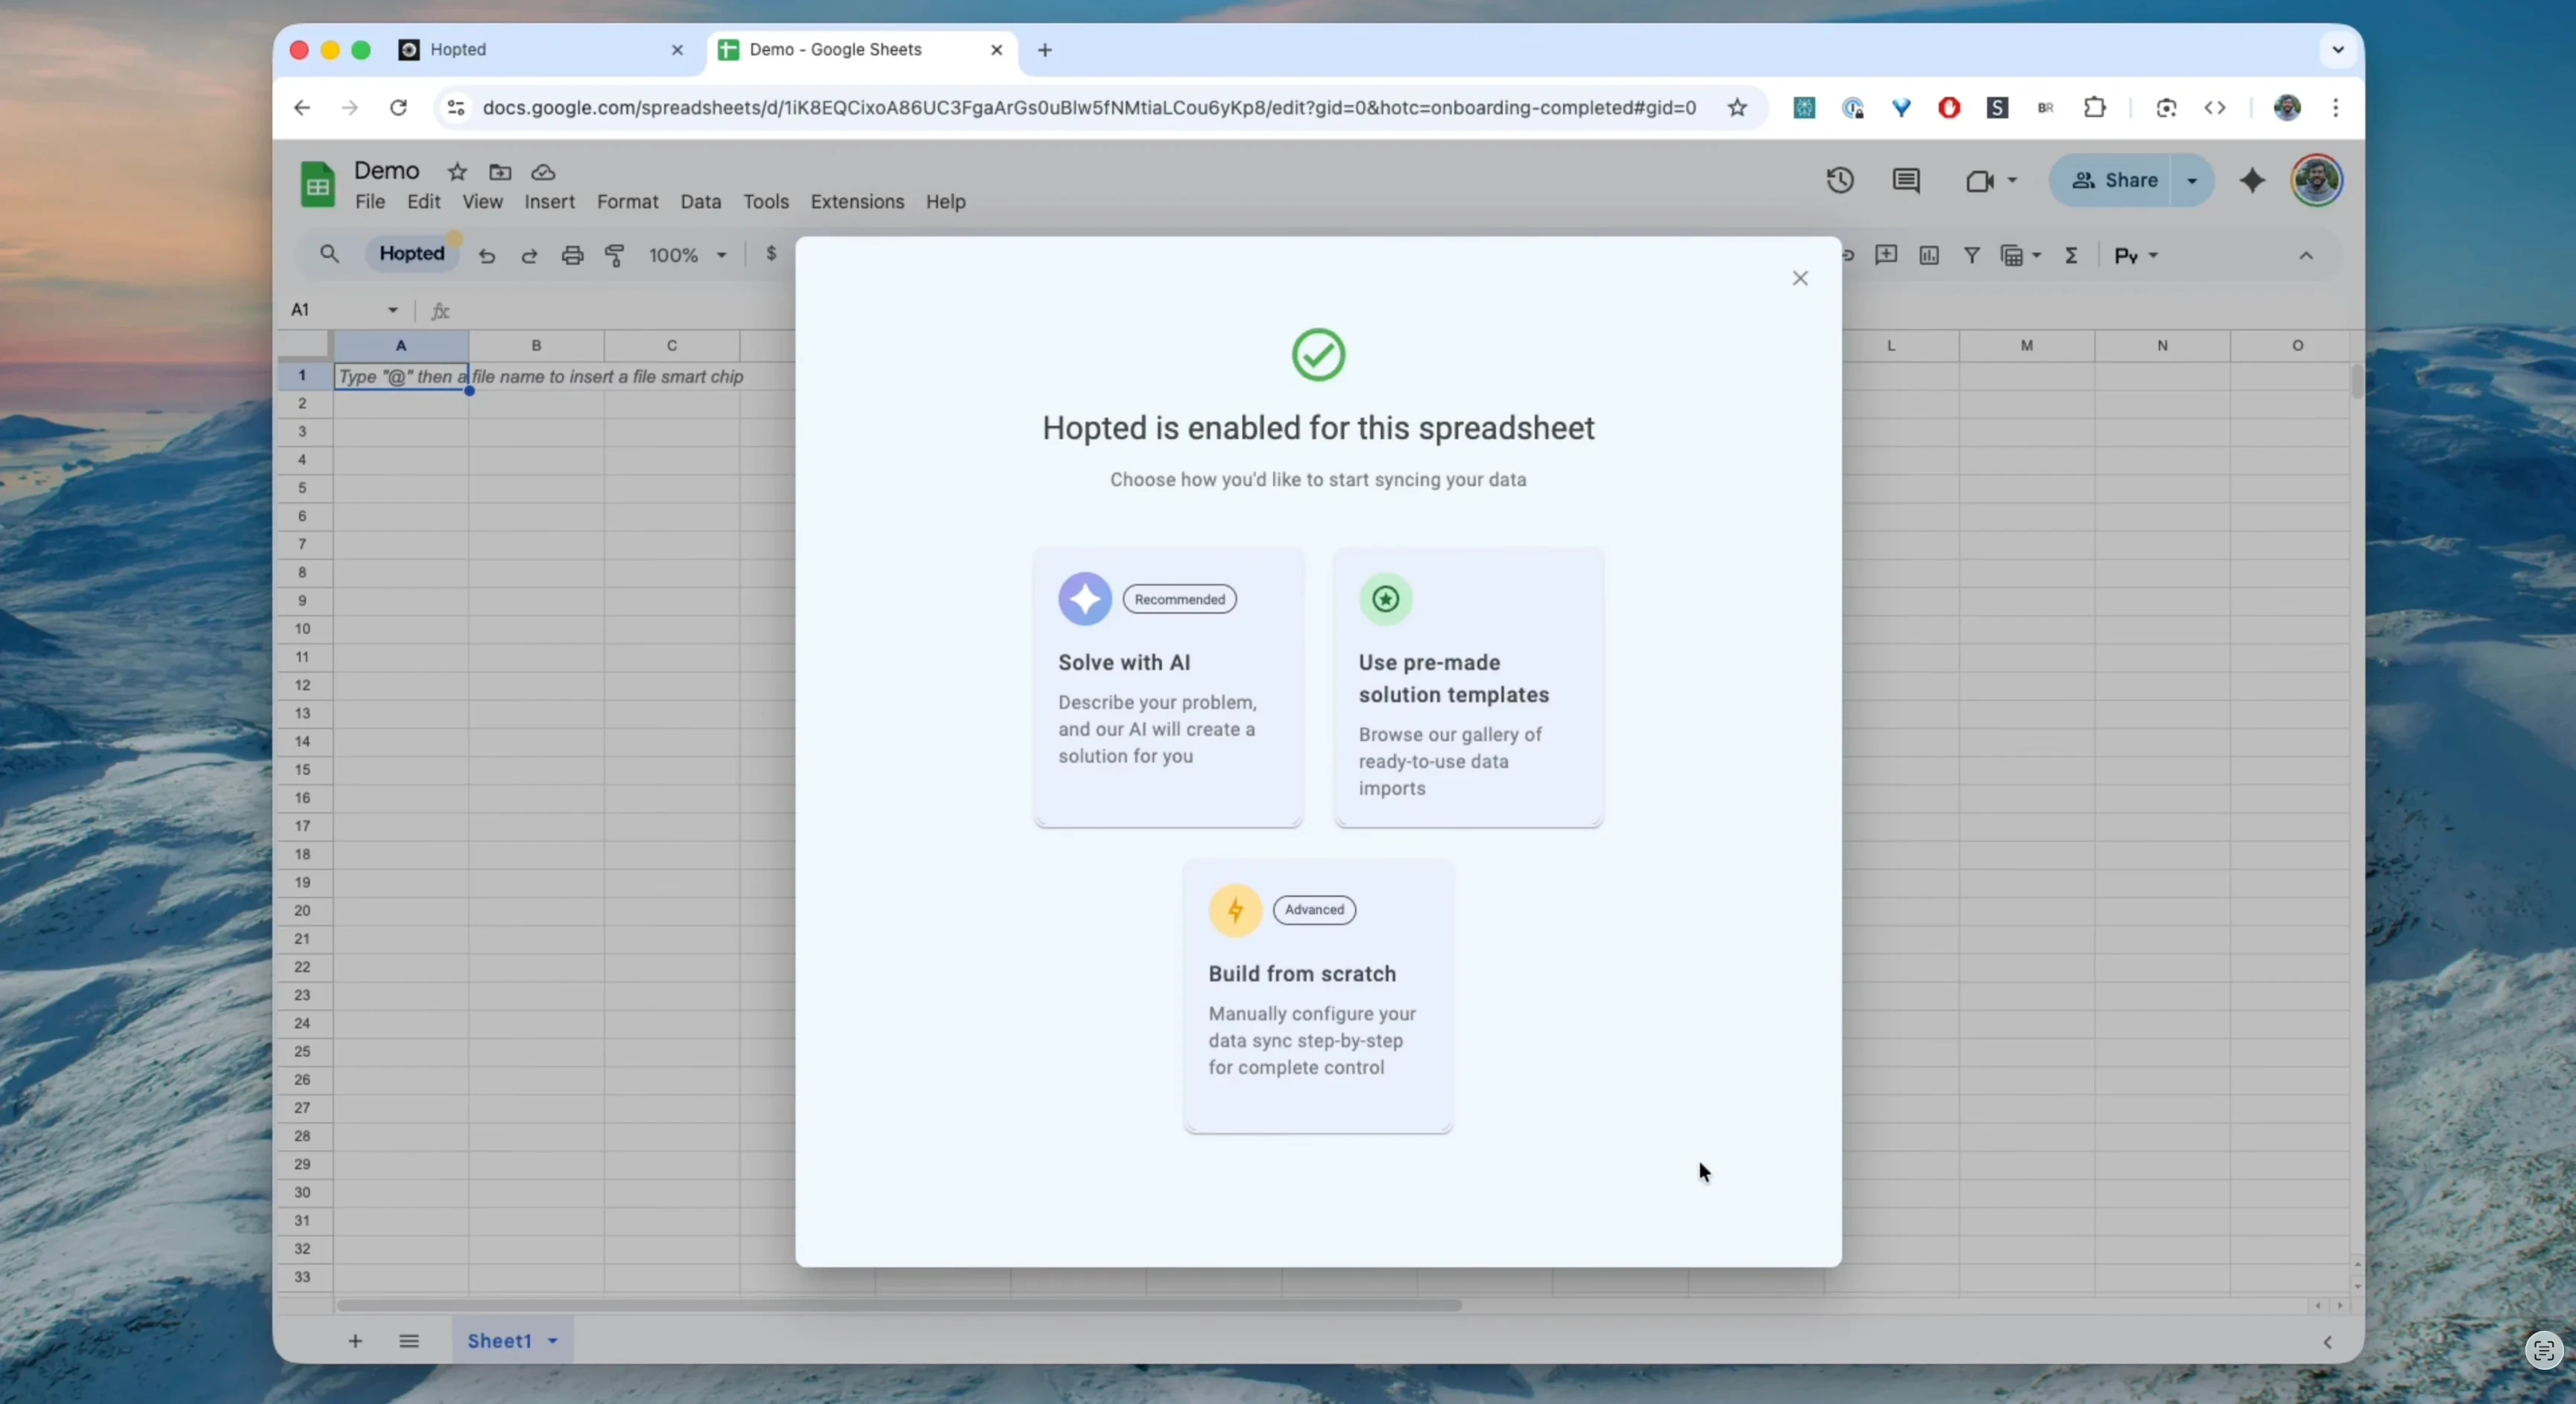
Now for the exciting part. Hopted gives you three distinct paths to pull your Amazon data. You can choose the one that best fits your immediate need [01:21].
You'll find all three options right in the Hopted sidebar [04:32].
Path 1: The "I Need it Now" (Pre-Built Solution Templates)
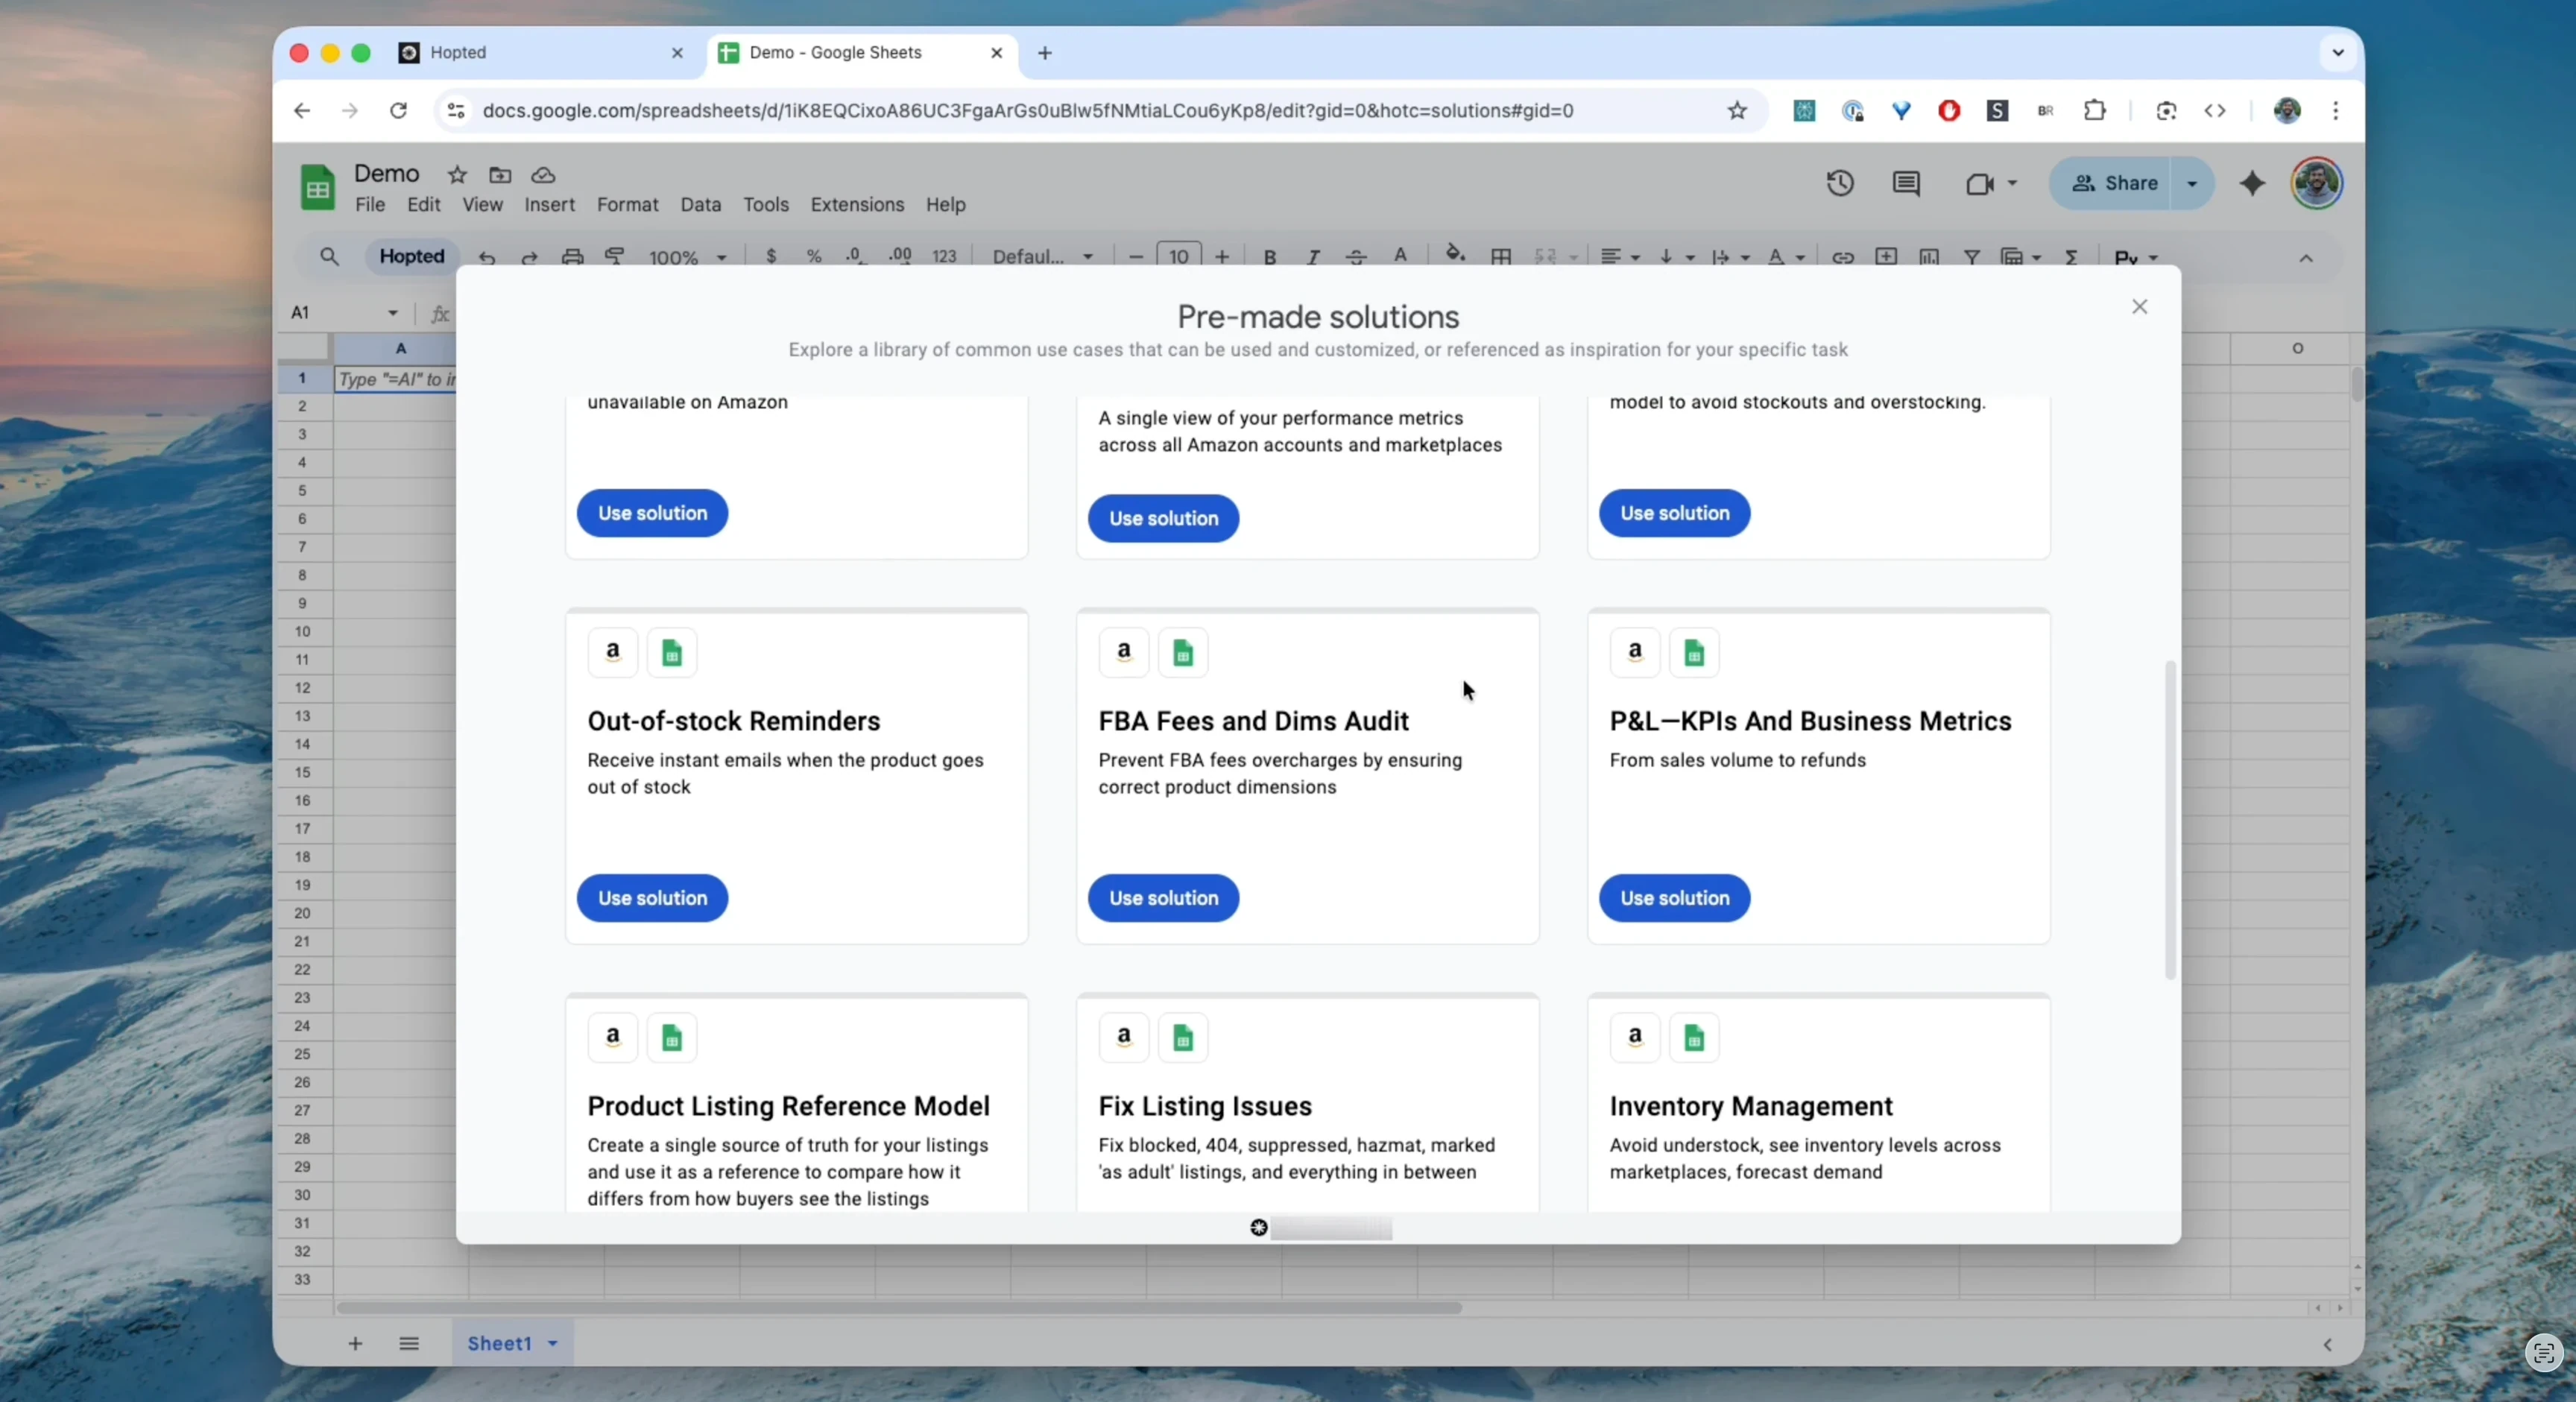
If you need to solve a common problem fast, this is your best bet. Hopted comes with a library of pre-built, ready-to-use solution templates [02:15].
What it is: Professionally designed reports for common use cases like FBA Fee Tracking or Profitability Analysis [01:40], [02:21].
How it works: You simply pick a template, click "Use Solution," and select which of your Amazon accounts to connect [02:30].
The Result: Hopted automatically adds new tabs to your spreadsheet, already populated with your live data. It's instant value [02:38].
Path 2: The "Do it For Me" (Solve with AI)
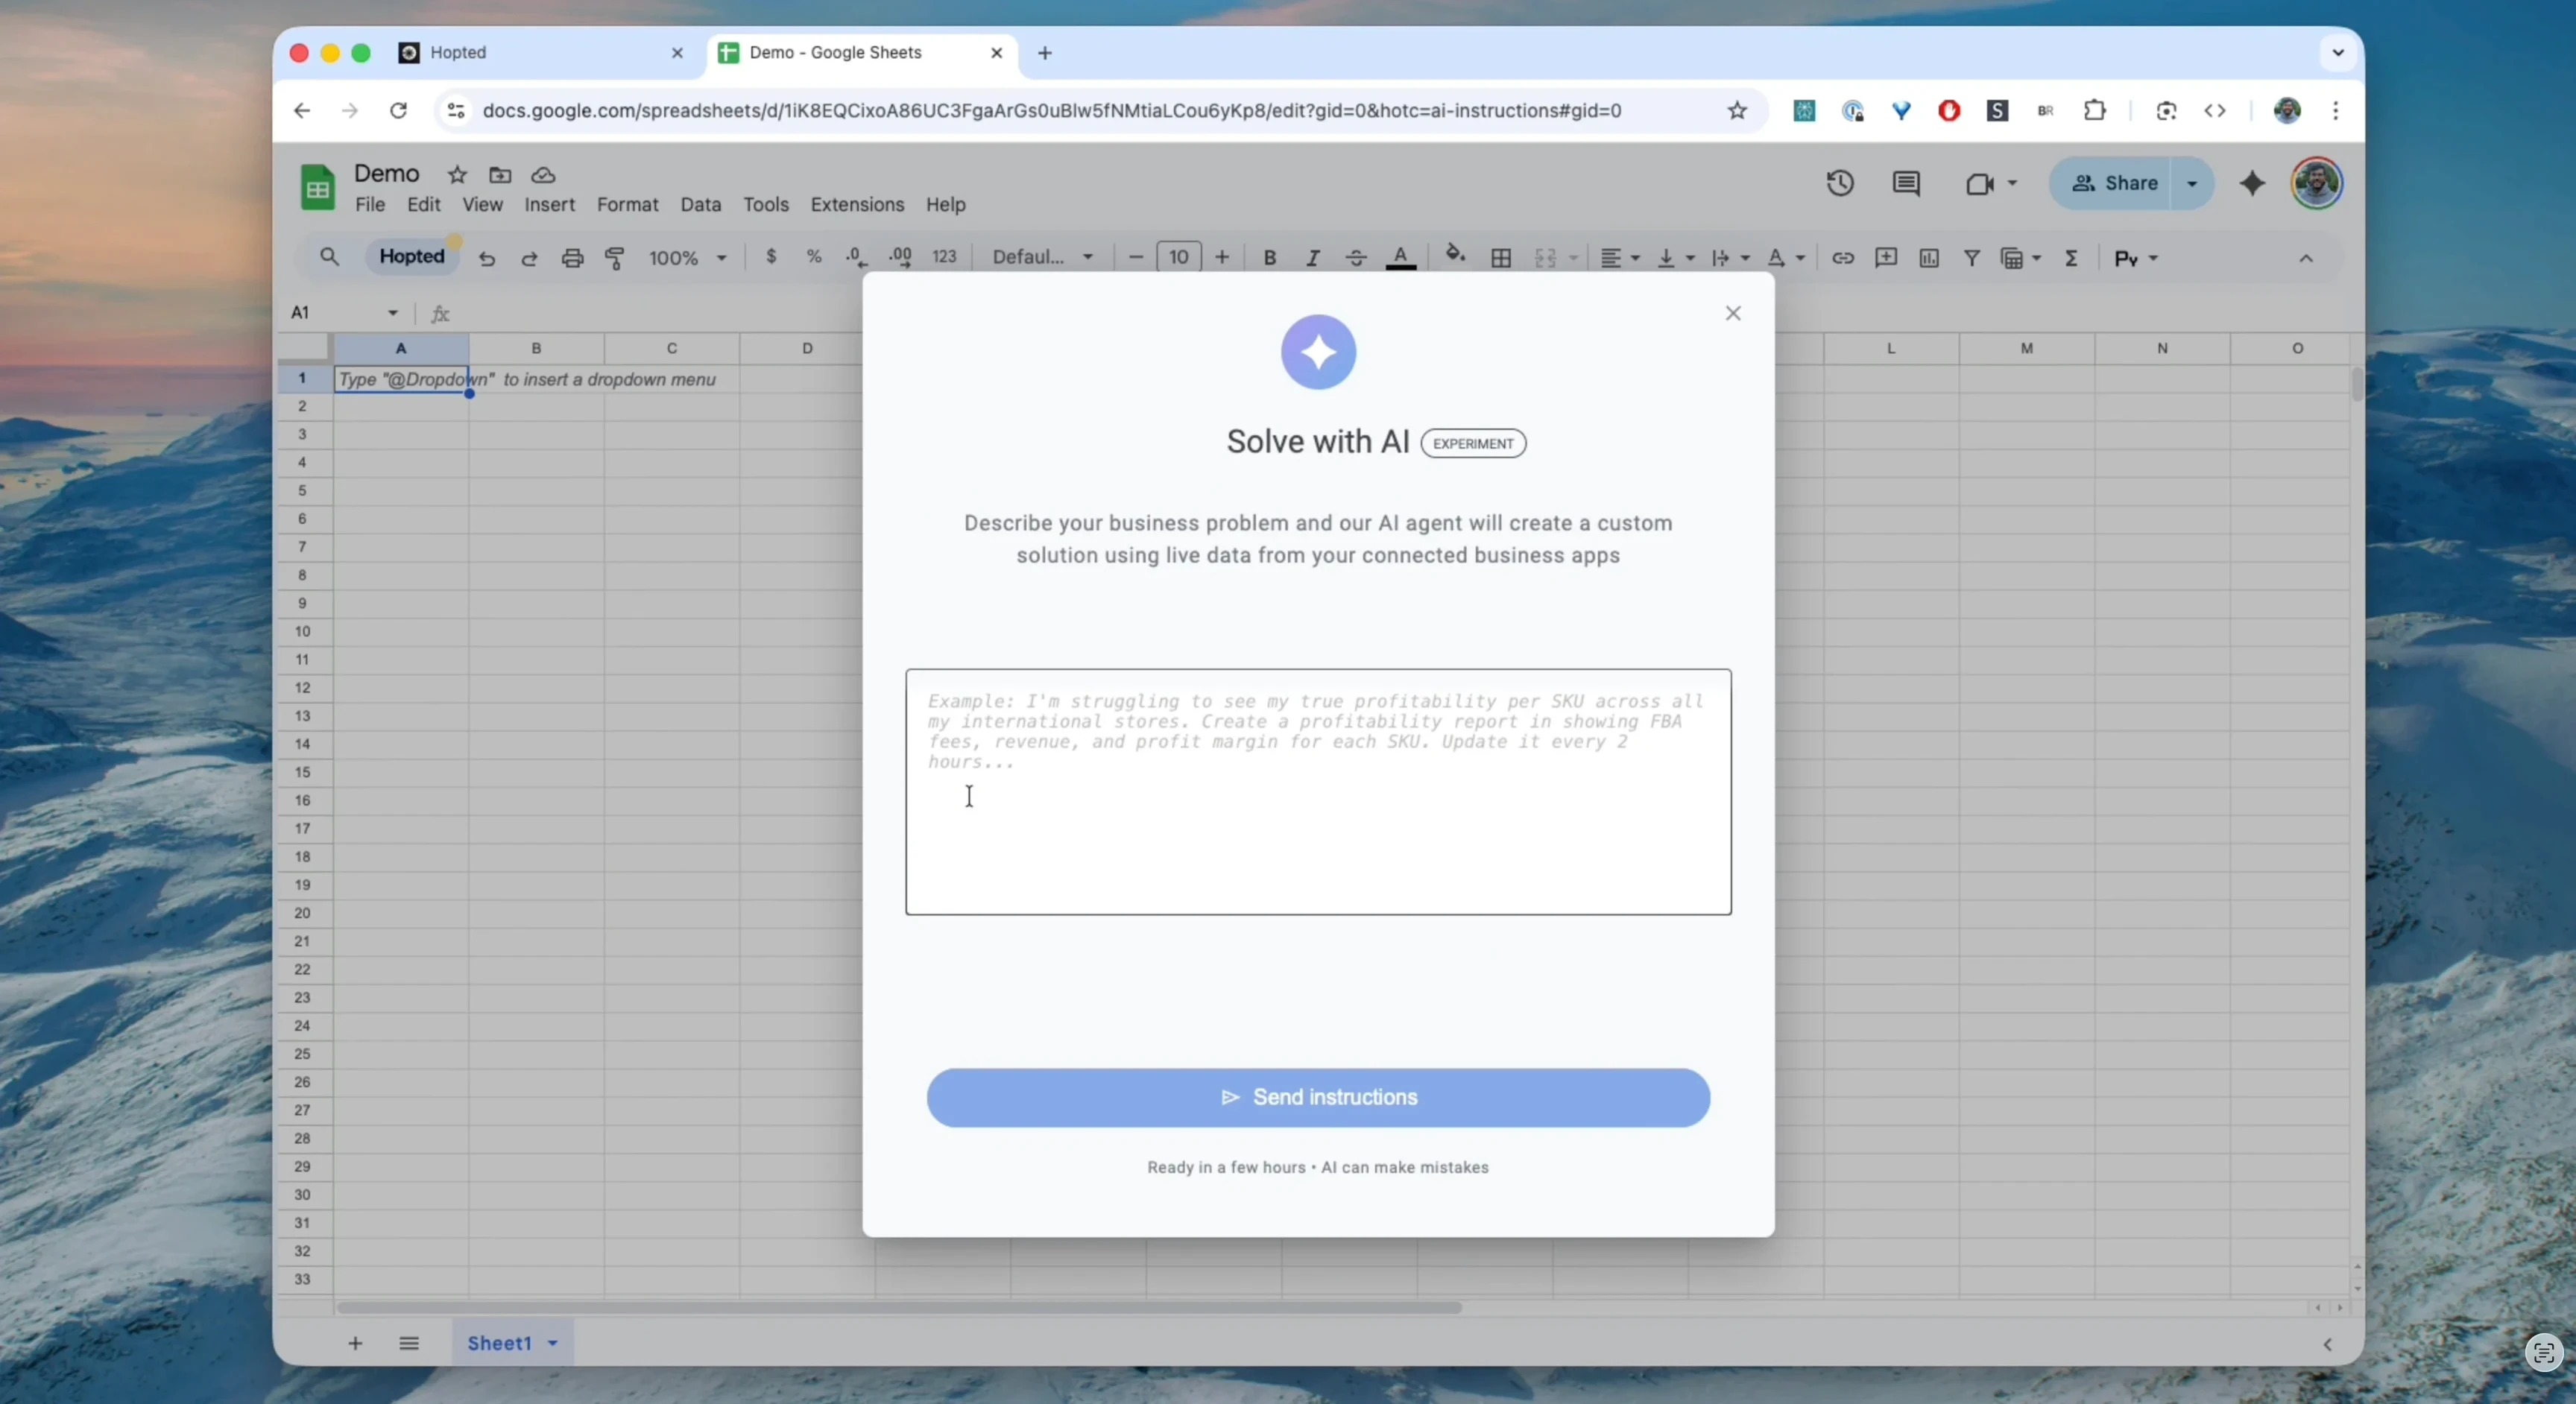
This path is incredibly powerful. If you know what you want but don't want to build it, you can just... ask.
What it is: An AI-powered report builder [01:27].
How it works: You describe your business problem in plain language [01:35]. For example: "I need to see my top 10 best-selling products from last month, showing sales, ad spend, and current inventory levels."
The Result: Hopted AI builds a report from the connected data. Before scheduling it, check the date range, marketplace, columns, and a few sample rows against the question you asked.
Path 3: The "I Know What I Want" (Build a Custom Report from Scratch)
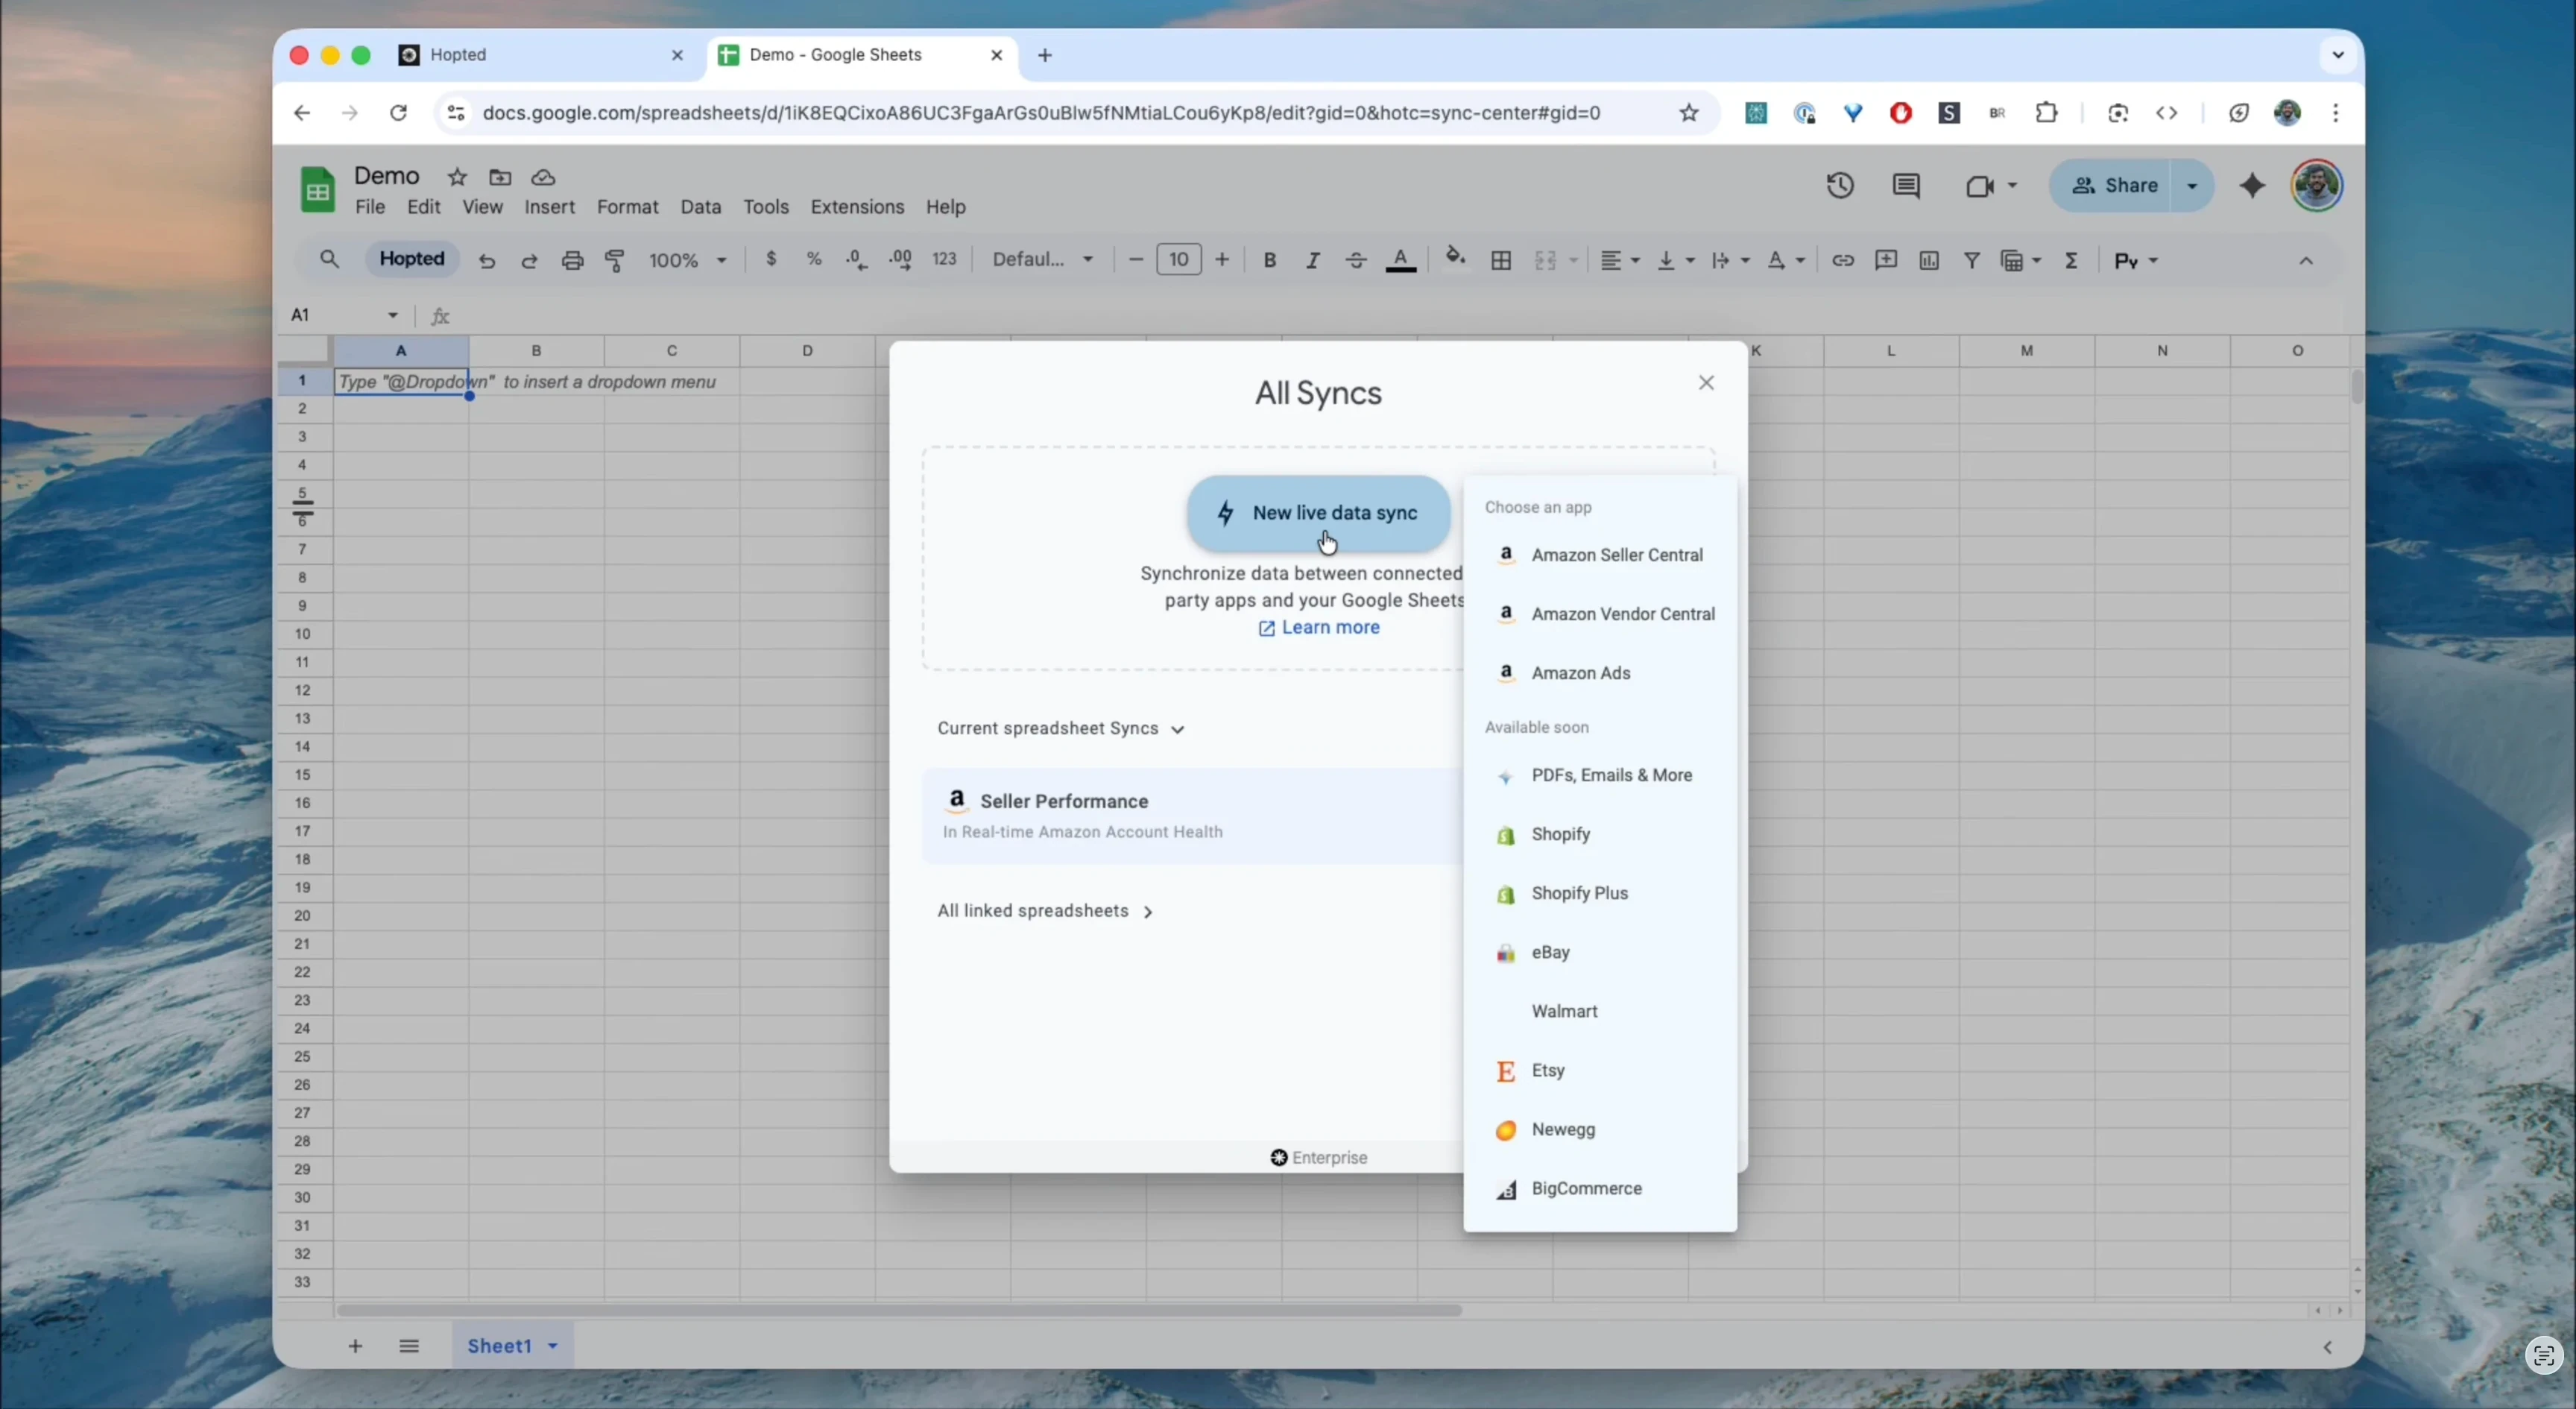
This is the most powerful and flexible option. This is for when you have an existing spreadsheet or a very specific report in mind [02:46].
Let's do a deep dive and build one together, step by small steps.
Part 4: Deep Dive—Building Your First Custom Sync (Step-by-Step)
This process gives you granular control over every piece of data in your report. Let's build a custom "Master Product" report that combines listing details, sales, and inventory data.
Step 1: Start the "New Live Data Sync"
In the Hopted sidebar, click the "New Live Data Sync" button to start the four-step wizard [03:01].
Step 2: Choose Your Source (Accounts & Marketplaces)
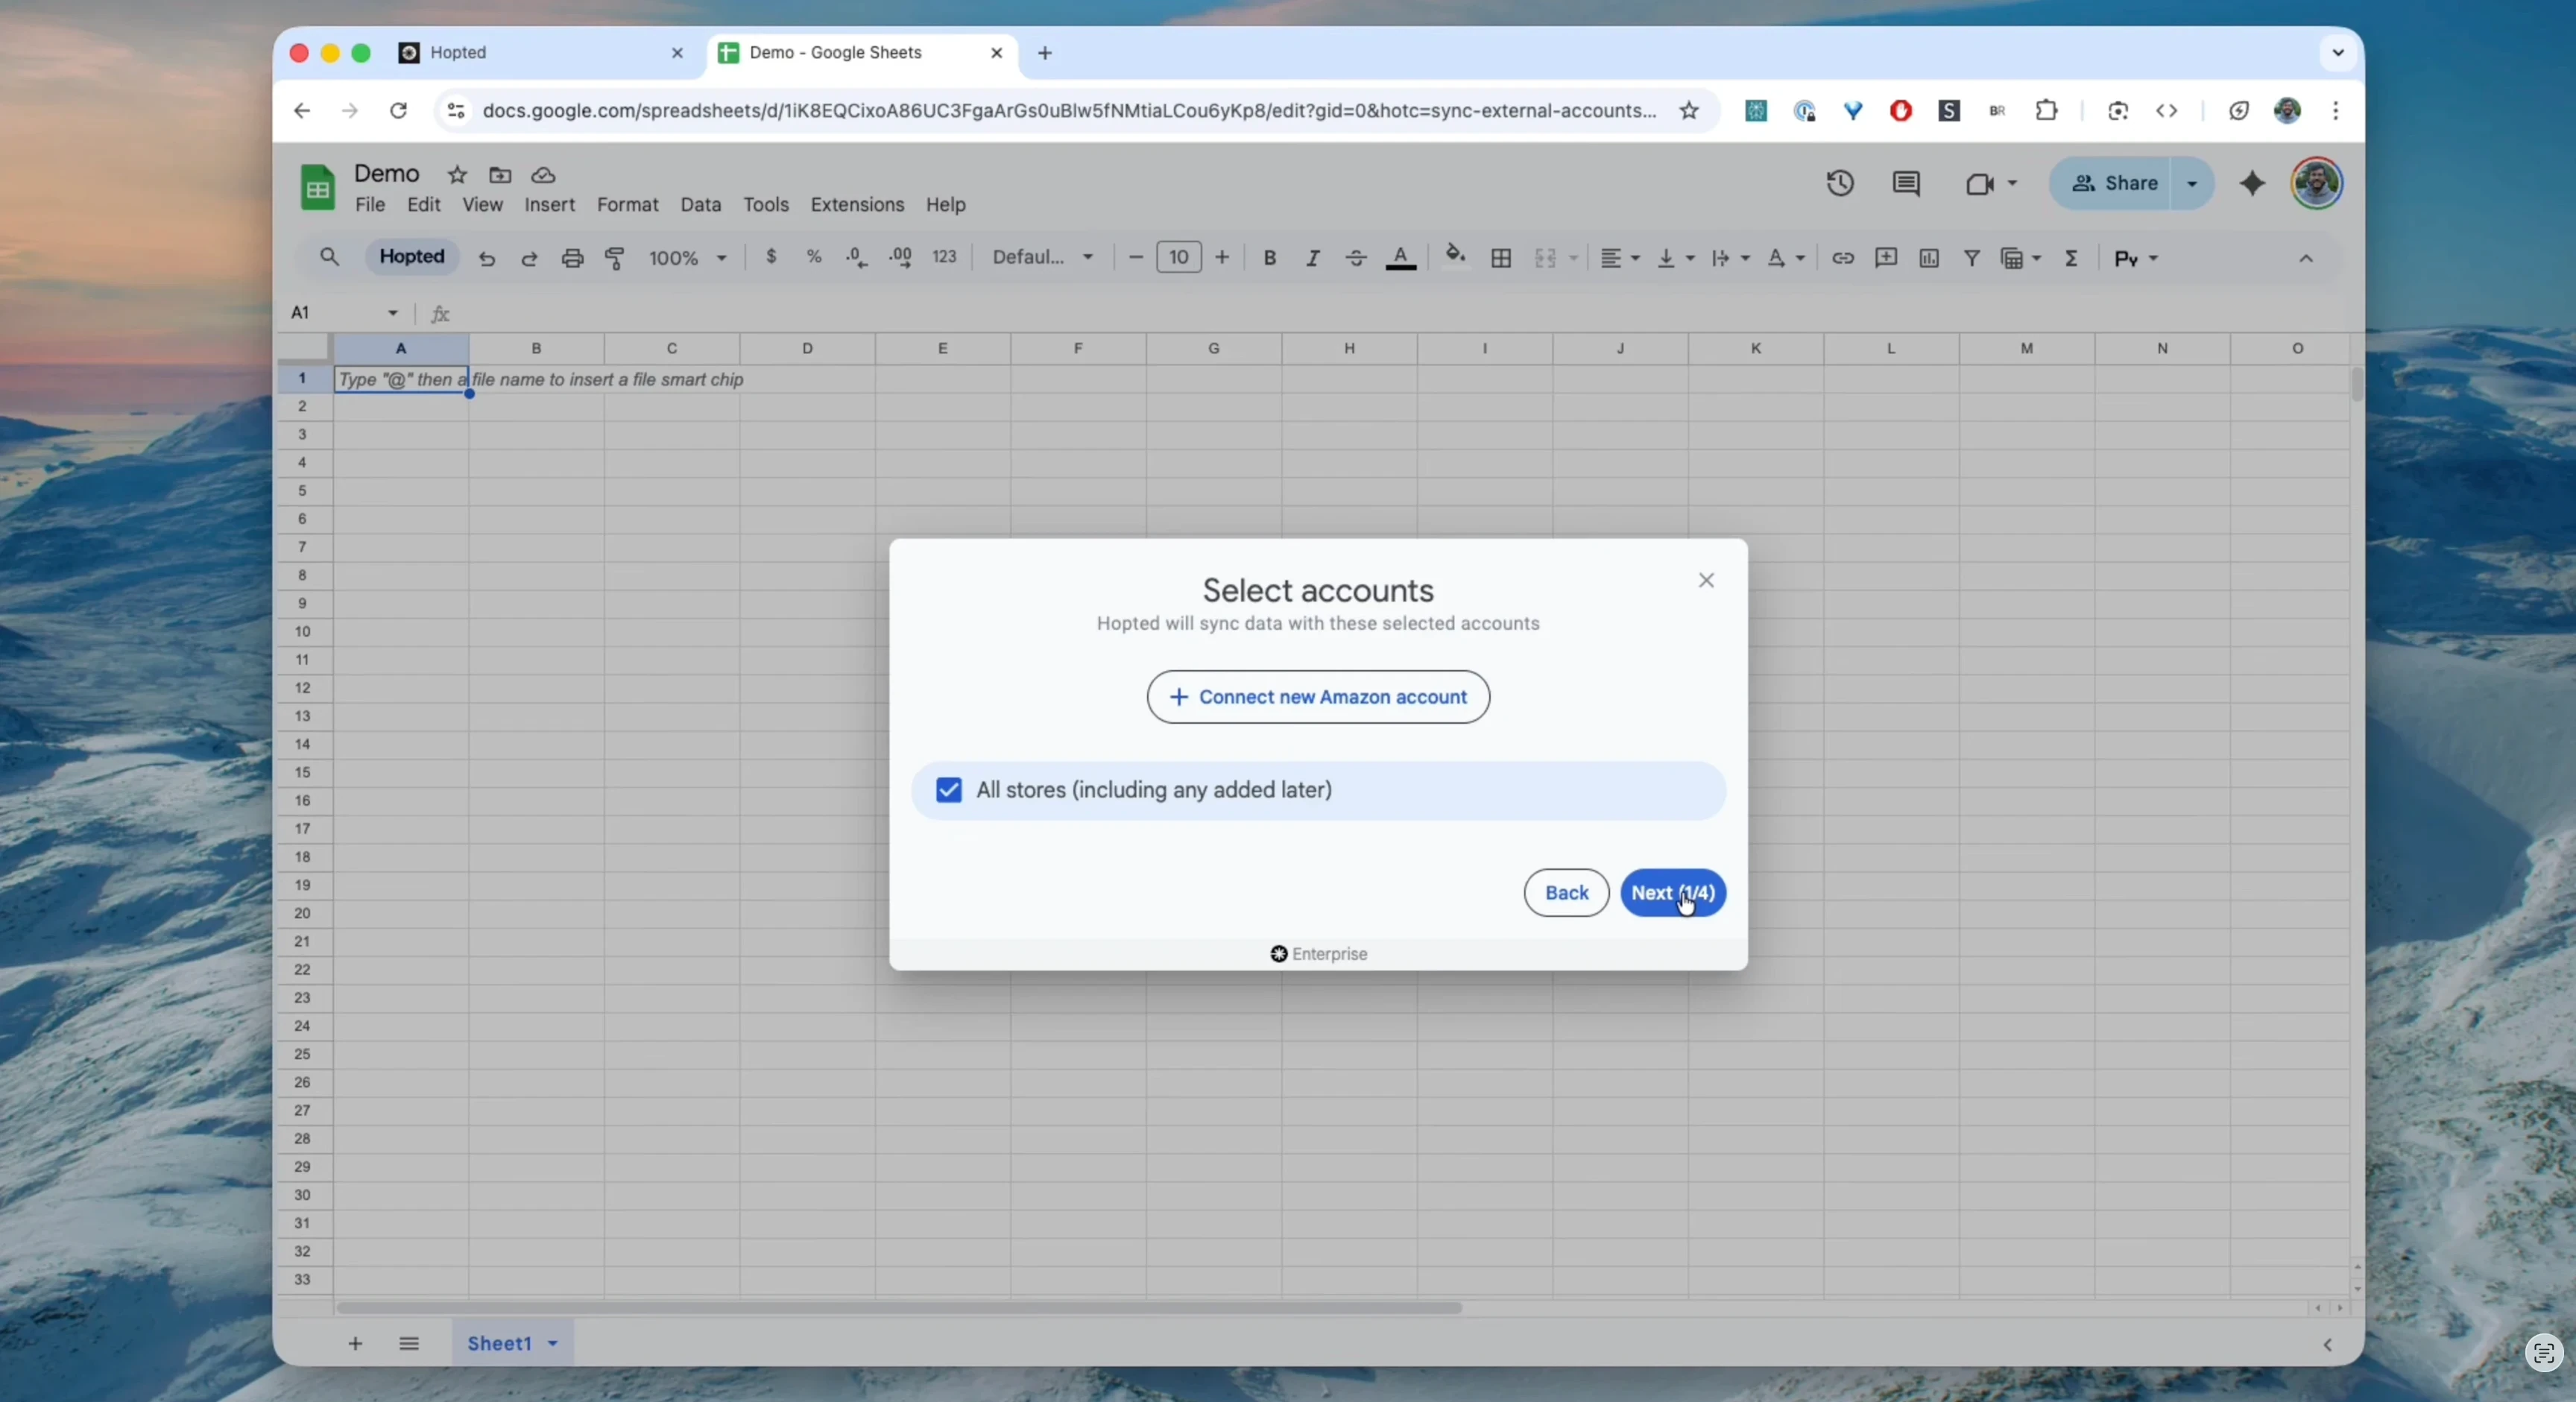
First, tell Hopted where to get the data. You can select:
One (or multiple) Amazon accounts.
The specific marketplaces you want to pull from (e.g., US, CA, UK) [03:07].
Step 3: The Magic of Data Blending (Choosing Your Attributes)
This is where Hopted truly shines and solves one of the biggest headaches for Amazon sellers.
In Amazon Seller Central, your data is siloed. Your inventory data is in one report, your sales data is in another, and your listing information is somewhere else entirely. Hopted lets you combine them as if they were all in one giant, simple database.
In this wizard, you'll select the reports and the attributes (which will become columns in your sheet) that you need [03:15].
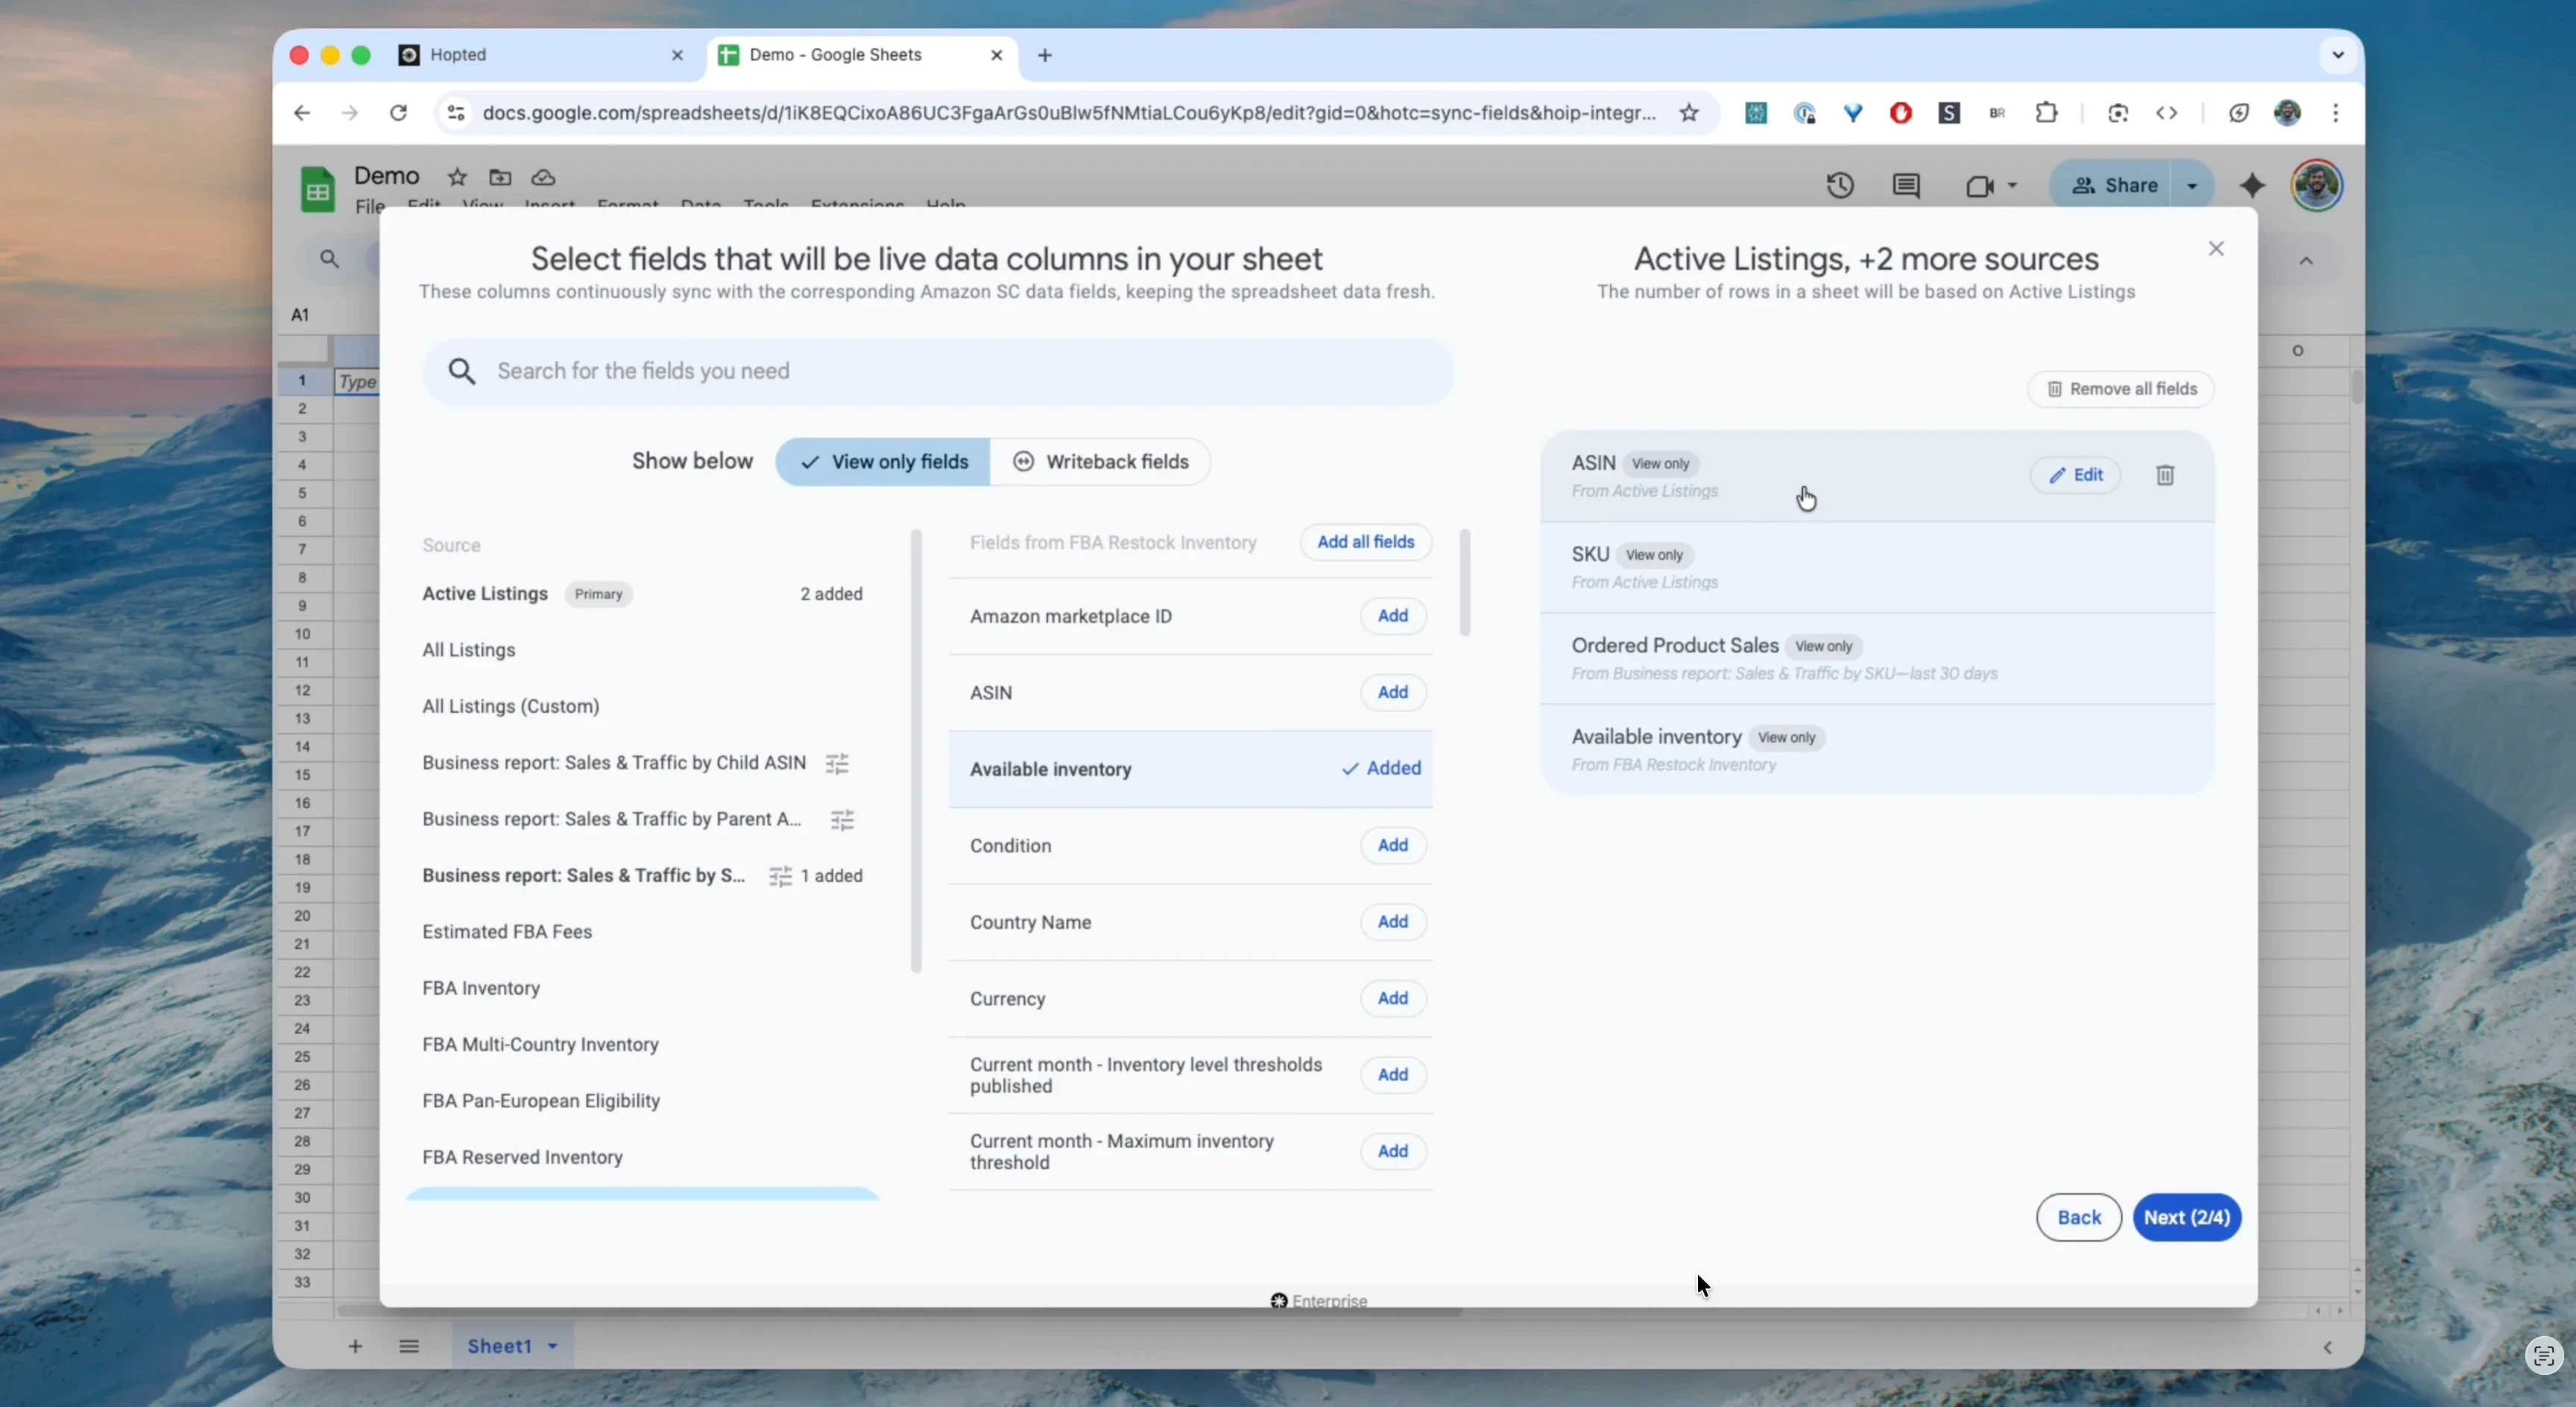
Let's follow the video's example [03:23]-[03:53]:
From the "Active Listings" report: We'll select our core listing info (e.g., SKU, ASIN, Title).
From the "Sales and Traffic" report: We'll add our sales figures for the last 30 days [03:38].
From the "Restock Inventory" report: We'll add the "Available Inventory Quantity" [03:44].
Three reports, one working table. Check the selected account, marketplace, date range, and product identifiers before relying on the result. Matching data is useful; mixing different reporting levels can still produce misleading totals.
Step 4: Set Your Schedule (Automation)
Once you've selected your data, you'll proceed to the final step: automation [04:07].
Choose the refresh interval offered by your plan. A more frequent sync does not make Amazon publish source data sooner; some reports arrive with a delay. (Amazon report documentation)
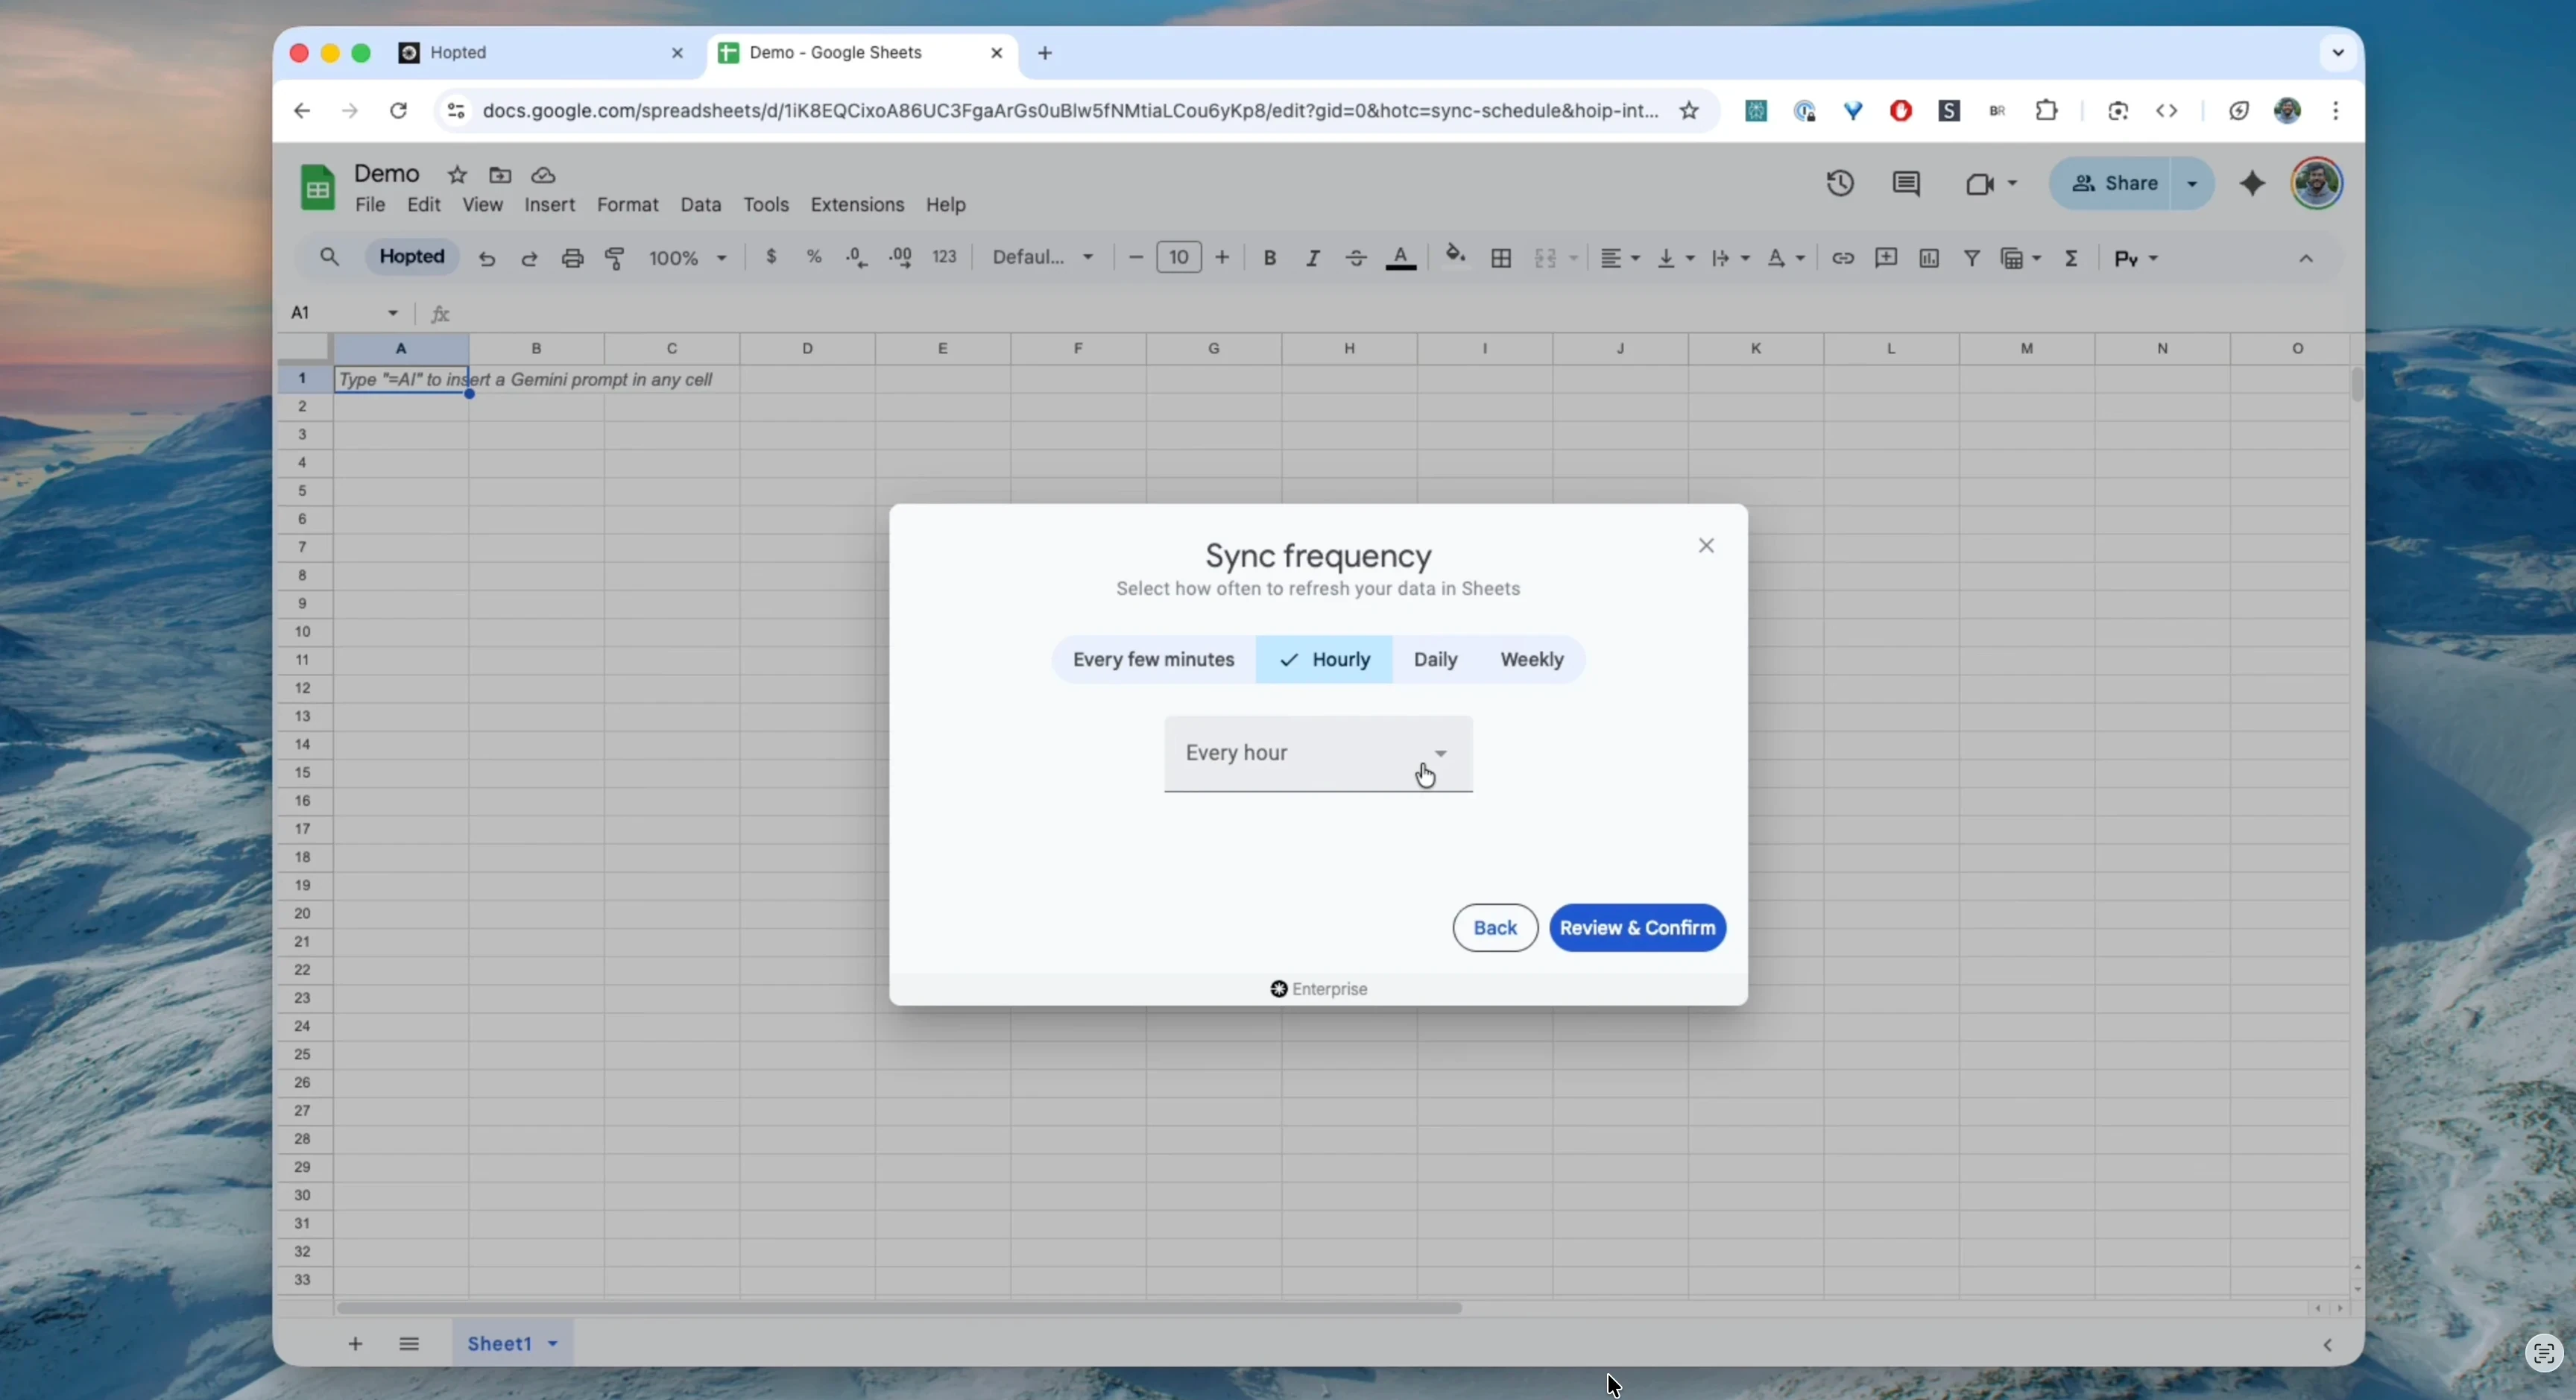
Click "Finish," and just like that, Hopted creates your custom automated report. Your Google Sheet will populate with the combined data you just designed [04:14].
Part 5: Hopted's Killer Features (Why You'll Never Go Back)
Building reports is one thing, but living with them is another. Hopted is packed with thoughtful features designed to integrate seamlessly into your existing workflow.
Feature 1: "Your Sheet is Still Your Sheet" (Preserving Custom Edits)
This is, without a doubt, one of Hopted's most critical features.
The Problem: Replacing an entire exported table can overwrite the notes and formatting your team added around it.
The Hopted Solution: Hopted works with your custom changes.
You can go ahead and completely customize the synced sheet [04:53]:
Rearrange or hide columns.
Apply custom sorting and filtering.
Add your own color-coded formatting.
Add new columns right in the middle for your own manual notes, forecasts, or "to-do" items [05:01].
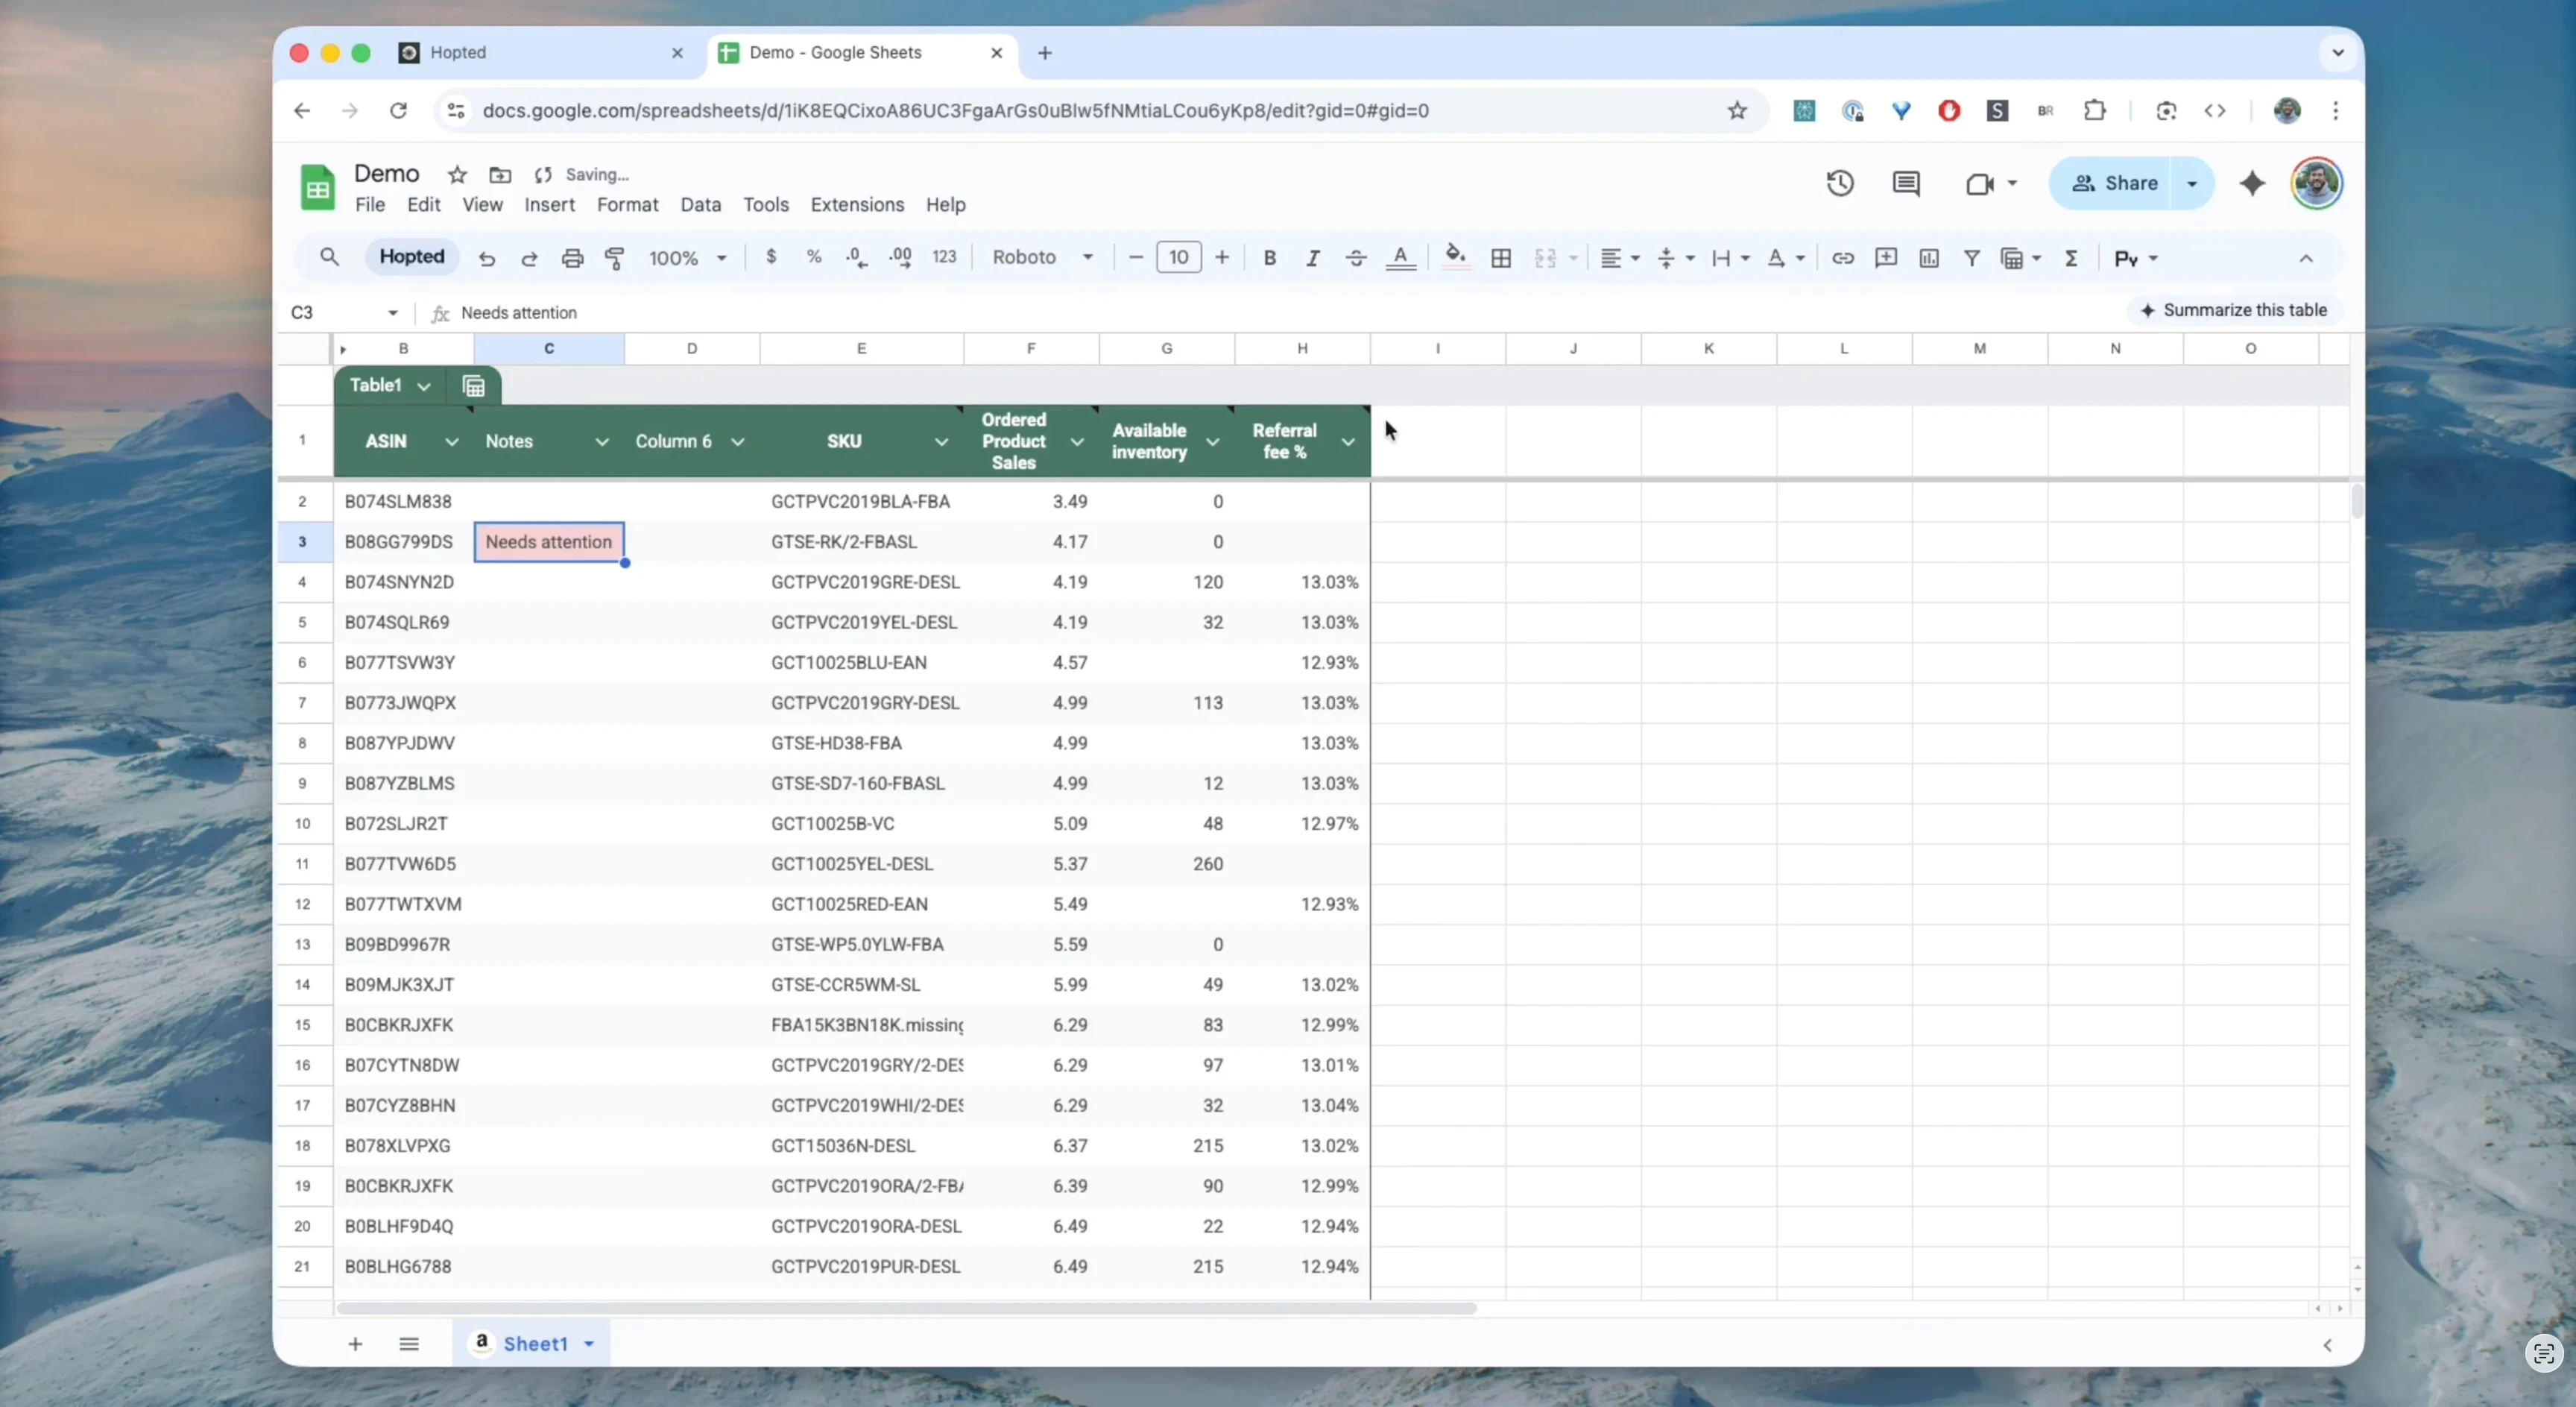
When your data refreshes, Hopted intelligently updates only the specific cells it's responsible for. Your custom notes, new columns, and formatting are left completely untouched [05:07]-[05:16].
You get the power of live, automated data with the total freedom of a normal spreadsheet.
Feature 2: The "Data VLOOKUP" Killer (Calculated Columns)
Calculated columns turn the selected data into a metric your team can reuse.
For example, divide a referral-fee amount by the matching price to see its share of that price. Amazon publishes category fee rates too; this calculation is a check, not a replacement for the fee schedule. (Amazon pricing)
With Hopted's Calculated Columns feature, you can build this yourself [06:05].
While editing your data sync, you can add a new "Formula Column" [06:19].
Let's name it "Referral Fee %" [06:32].
In the formula builder, you can write a simple formula, just like in Excel:
= [Referral Fee] / [Price][06:44]
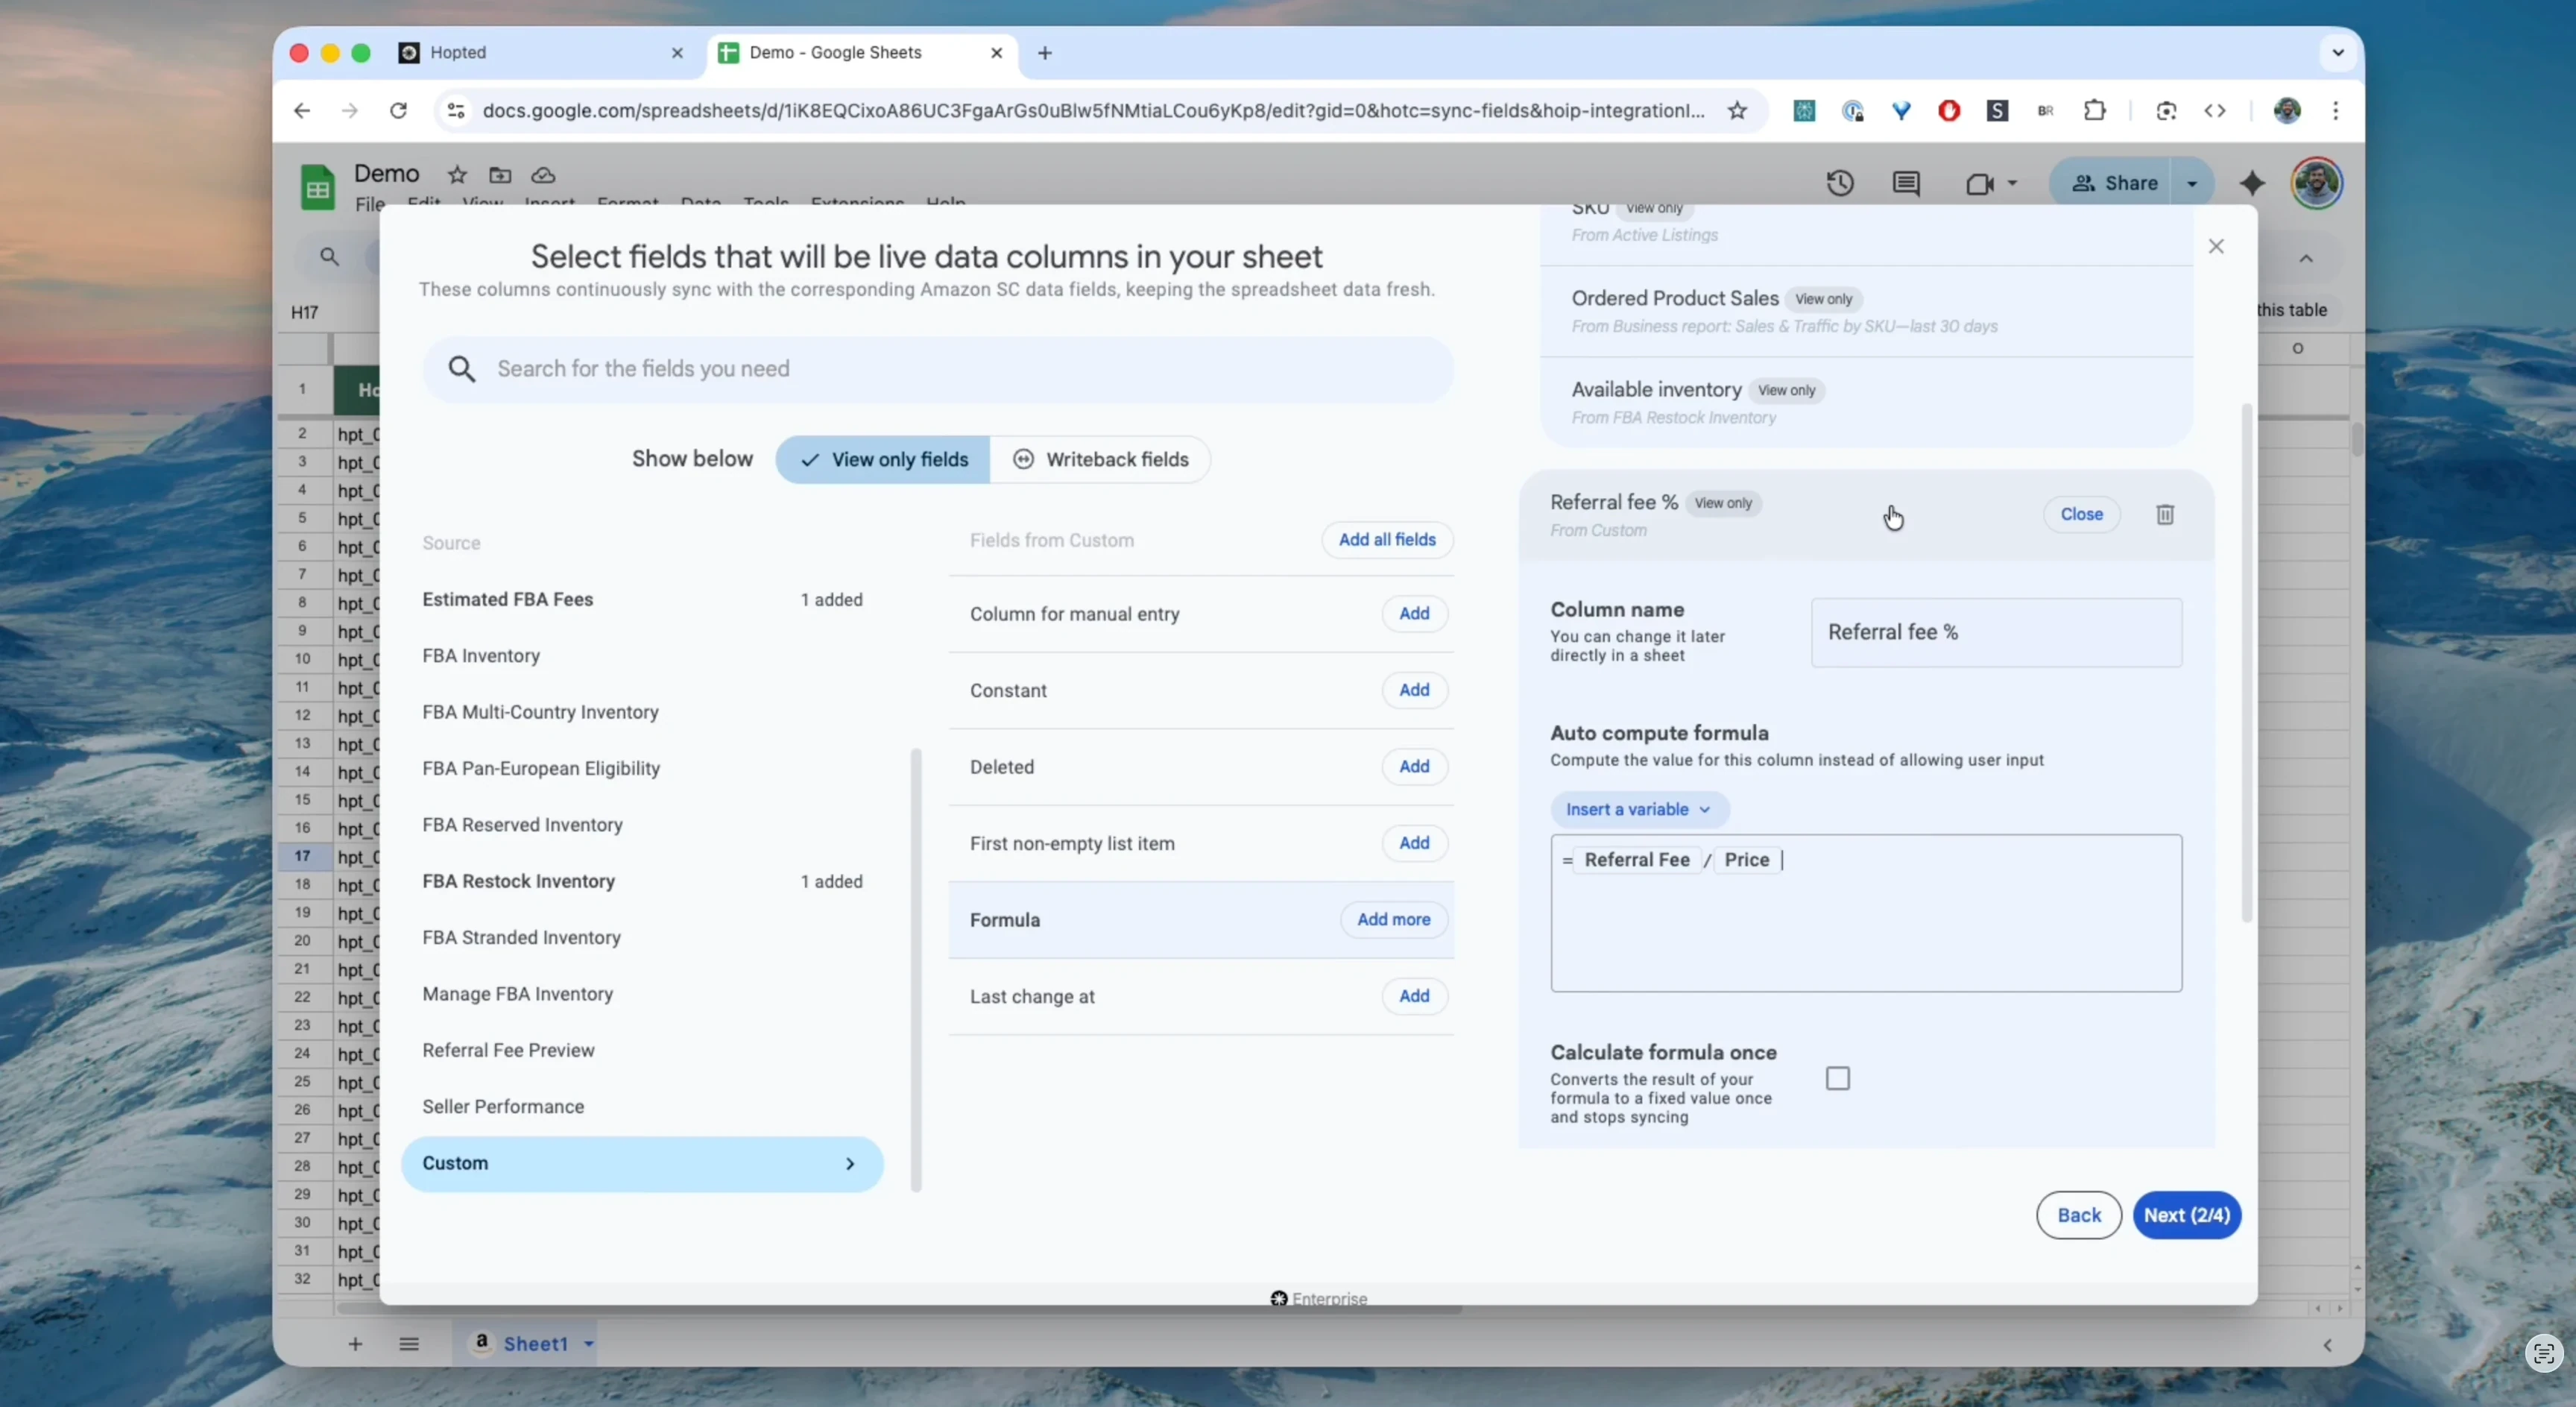
Here's the magic: Just like in our earlier example, the Referral Fee and Price attributes might live in two completely different Amazon reports. Hopted doesn't care. It does the heavy lifting of finding and joining them for you in the background so you can use them in one simple formula [06:51]-[06:58].
Use values in the same currency and handle blank or zero prices before dividing. Format the result as a percentage. Its a small check, but it saves confusion later.
Feature 3: The Command Center (Hopted Sidebar)
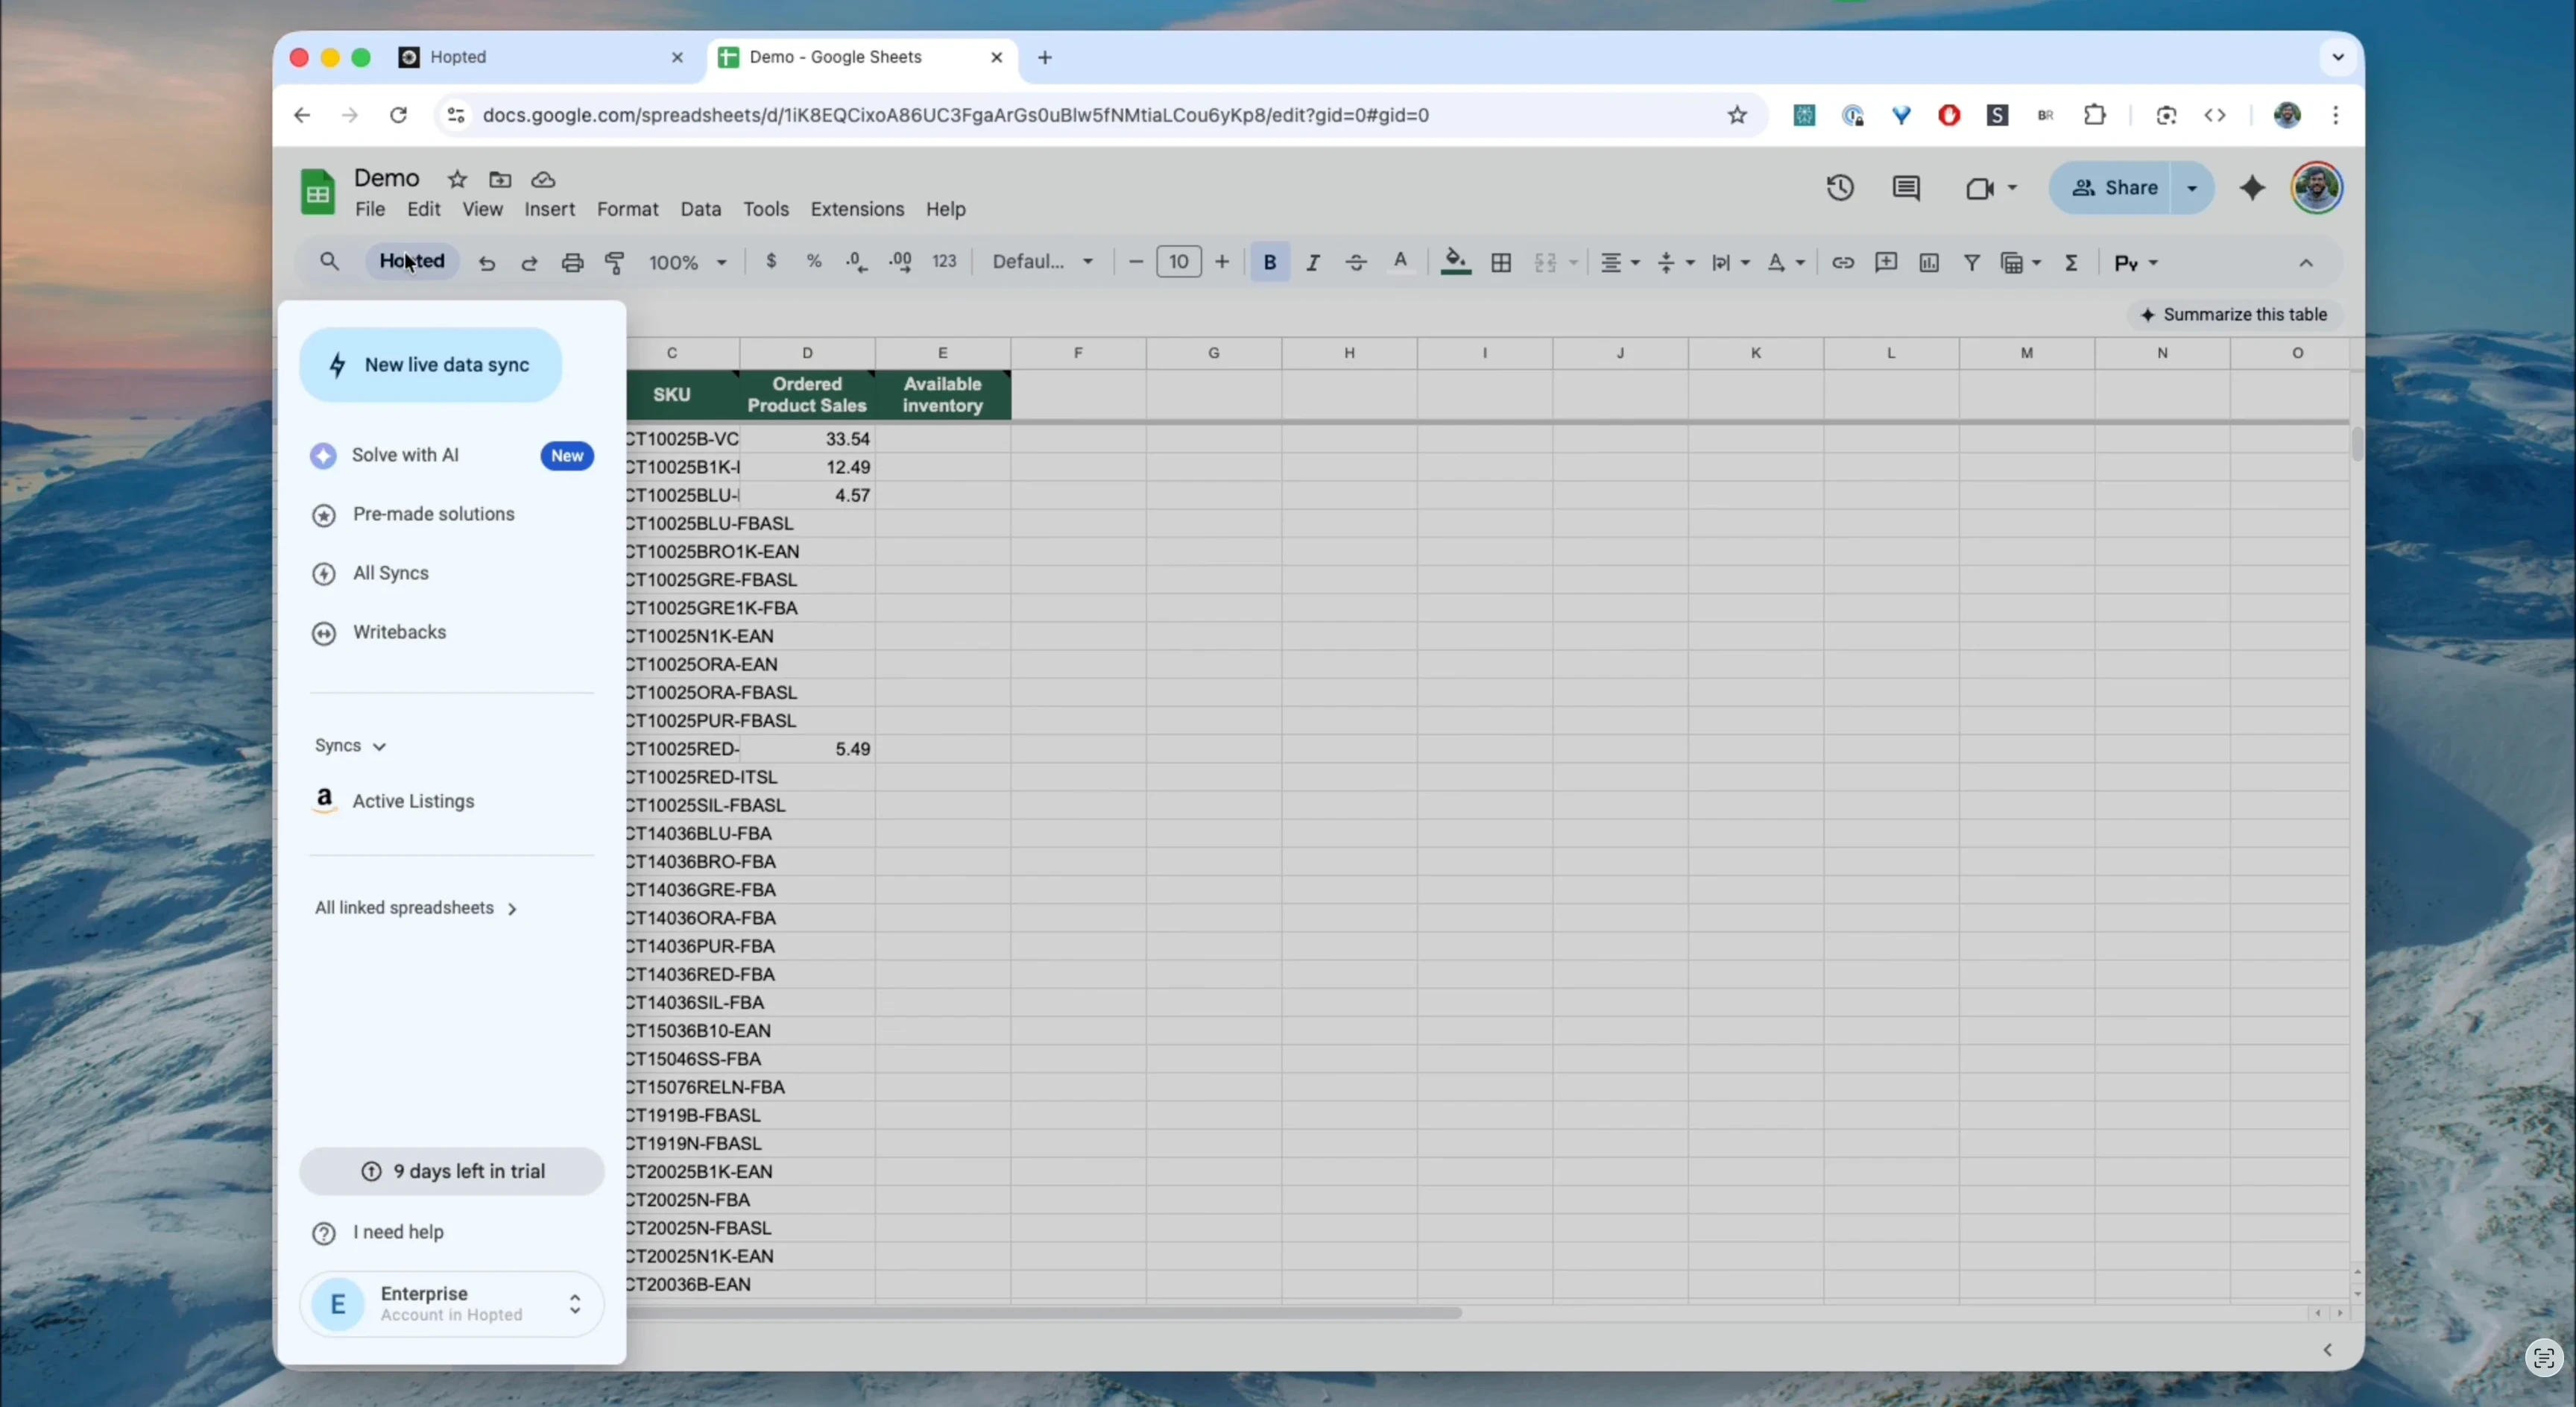
The Hopted sidebar is your central entry point for everything [04:26]. From here, you can:
Launch any of the three data-sync paths (AI, Templates, Scratch) [04:32].
See a list of all your current automations.
Access your automation settings to change the refresh schedule [04:42], [05:38].
It keeps all this power neatly organized and accessible right where you work, without ever having to leave your Google Sheet.
Conclusion: Stop Exporting, Start Syncing
The old way of managing an Amazon business—drowning in a sea of exported CSV files—is slow, inefficient, and full of human error.
Hopted fundamentally changes that workflow.
By bringing your live data from Seller Central, Vendor Central, and the Ads console directly into your Google Sheets, Hopted gives you:
Time back: Automate the manual reporting that used to take hours.
Less manual copying: Scheduled syncs reduce copy-paste mistakes. Keep checking source freshness and your own formulas too.
Powerful, blended insights: Combine data from separate reports to see the full picture.
A "no-code" solution: Empower your entire team (not just the data experts) to build the reports they need.
You can spend less time moving data around and more time using it. Start small check a handful of rows, and then expand the report.
Ready to take control of your Amazon data?